1. INTRODUCTION
Welcome to the MIST Configuration Guide. This guide is designed to provide you with detailed information and step-by-step instructions for connecting to Blyott using MIST AP devices.
Take kindly note, the purpose of this guide is to show you the basic connection with Blyott and external devices from MIST using our endpoint. Any additional information on setting the MIST device should be found in official MIST documentation.
2. CONFIGURE YOUR SITE ORGANIZATION
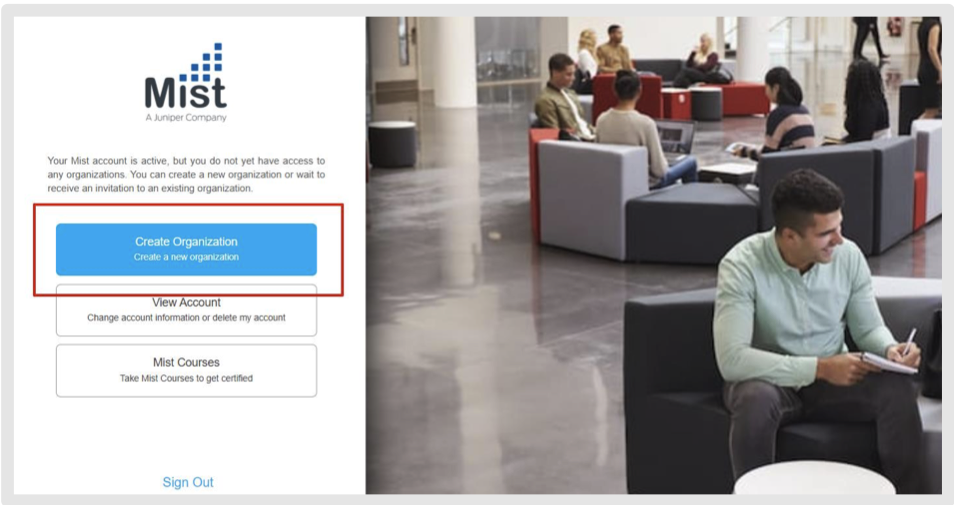
After you have created the account on manage.mist.com and ensured your MIST AP device is powered and ready, sign in and proceed to create an "Organization":
-
Click „Create Organization“.
-
Enter your name and click „Save“.
You will now land on the MIST managing dashboard where you can see the following options on the left sidebar.
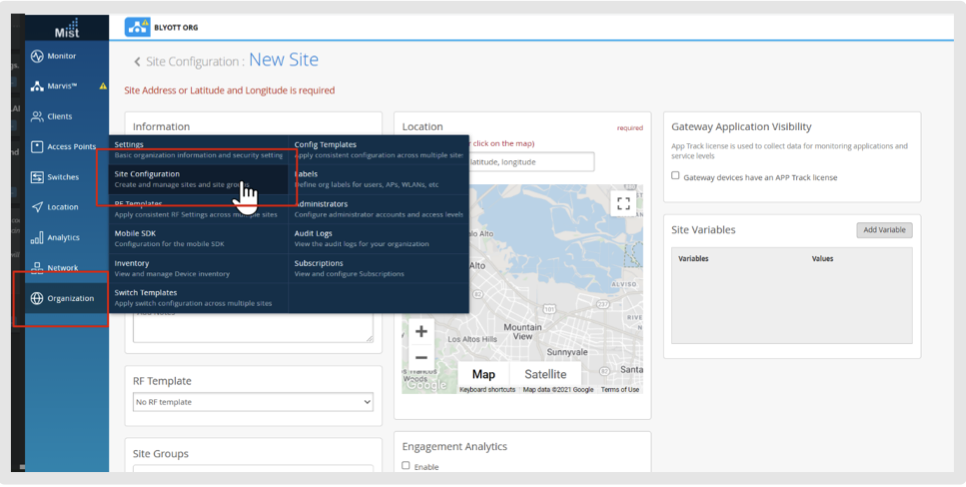
3. Go to „Organization“ then select „Site Configuration“.
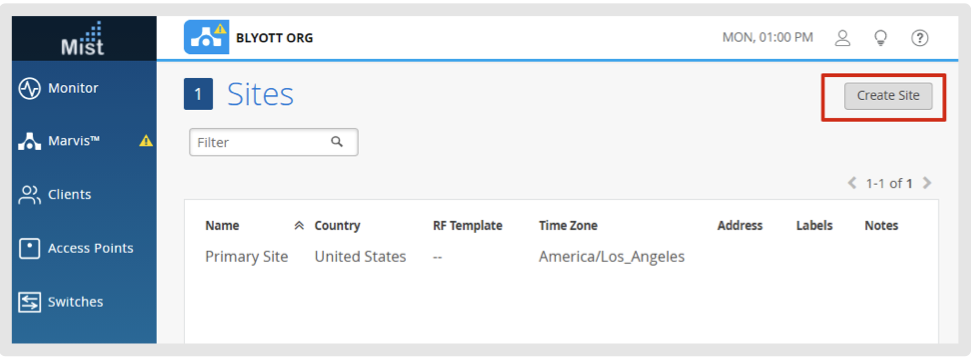
4. Click „Create Site“ or select the existing Site of interest.
Here you can configure the site information based on your needs („Site Name“ and „Location“ are mandatory), but most important options for connecting with Blyott are the following.
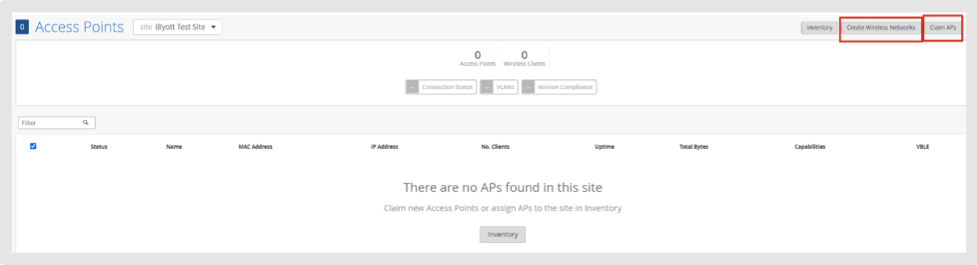
Access Points Note: APs with BLE technology need to be added or claimed in “Access Points” for the created sites as they will listen to the Blyott sensors and forward the required information.
- Click „Enable“ in the Webhooks section which will open the following:

-
Fill your desired „Name“ of the Webhook.
-
Fill the following Blyott endpoint „URL“: https://proxylocator.blyott.com/webhook/mist

Make sure to select „Raw data“ in „Streaming API“ section.
„Streaming API“ section is optional, based upon your needs. But for basic configuration you need to enable „Raw data“ which will be available on your screen.
Next step is enabling vBLE in the „Bluetooth based Location Services“ section.
4. ENABLE VBLE ENGAGEMENT
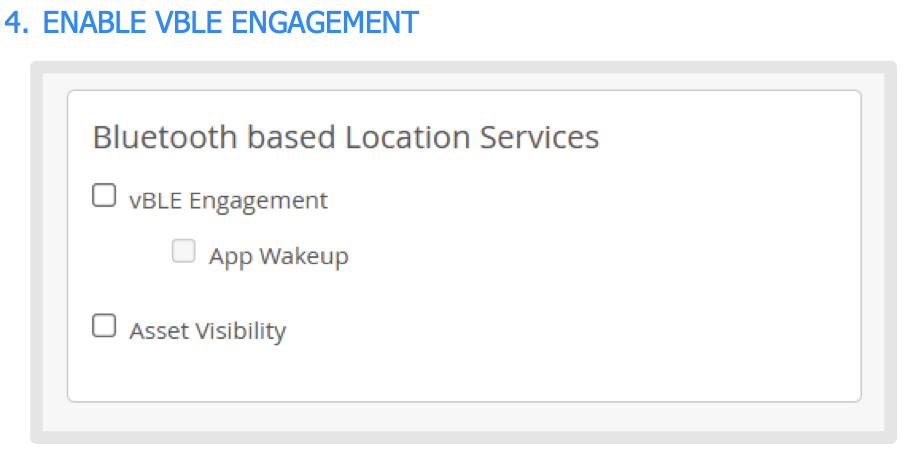
Within the "Bluetooth-based Location Services" section, you must enable two specific options to establish the connection:
-
Enable „vBLE Engagement“
„App Wakeup“ is optional if you are going to use the MIST app (more information in the MIST manual above). This will enable vBLE array on ALL Mist Aps for the selected site. -
Enable „Asset Visibility“
-
After you filled all requirements for Blyott connection, click „Save“ on the top right to
save your Site.
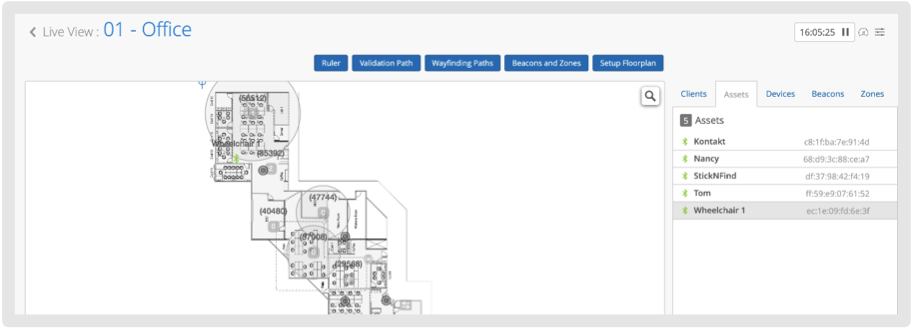
5. ADD A FLOOR PLAN
An additional configuration that is required is to add the floorplan and add the Mist APs on this map. This allows Mist to complete the webhook information that Mist will be sending out.
-
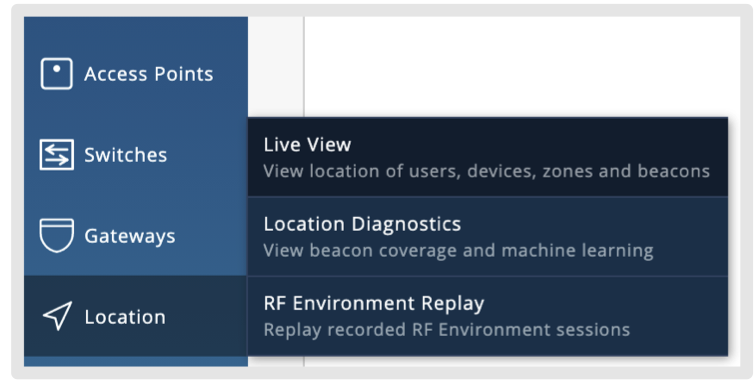
Click on “Location”, then “Live view”.
-
Click on “Add Floorplan” in the upper right, enter desired name and upload Floorplan image.
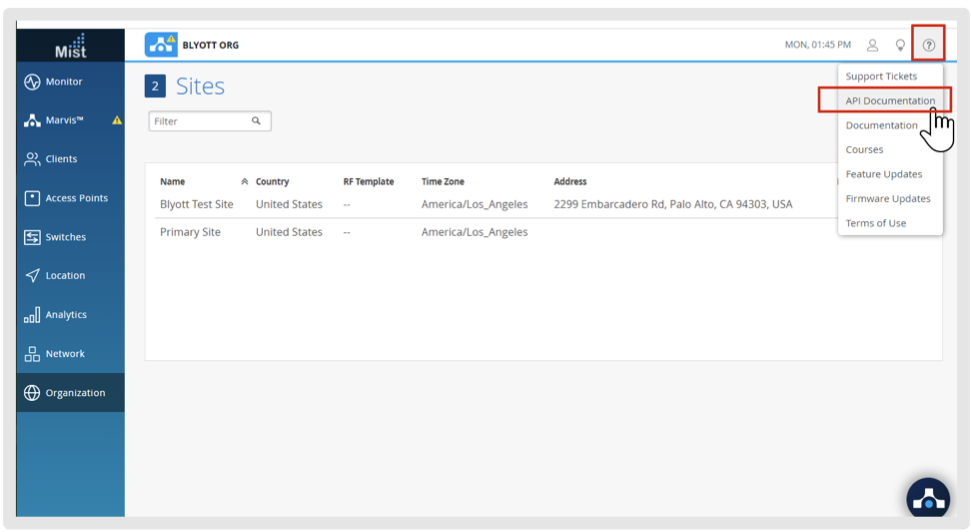
6. MIST API DOCUMENTATION
7. EXAMPLE DELIVERY OF “ASSET-RAW” VIA HTTP-POST:
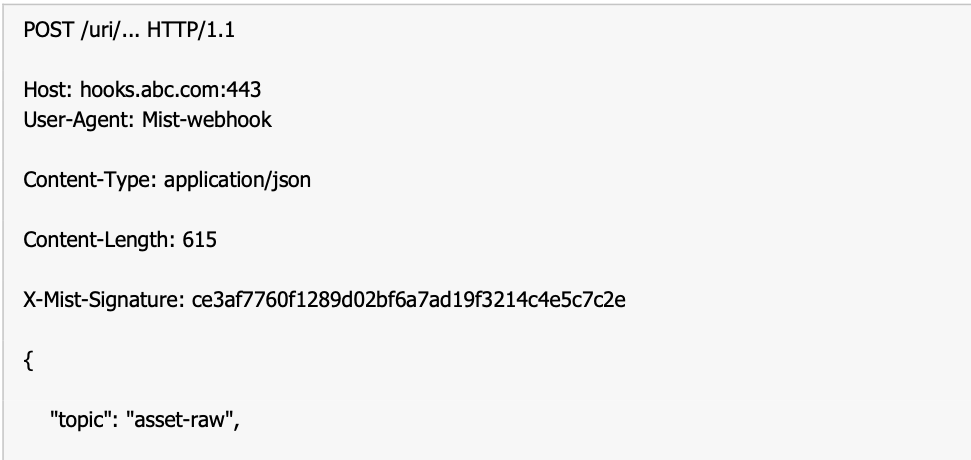
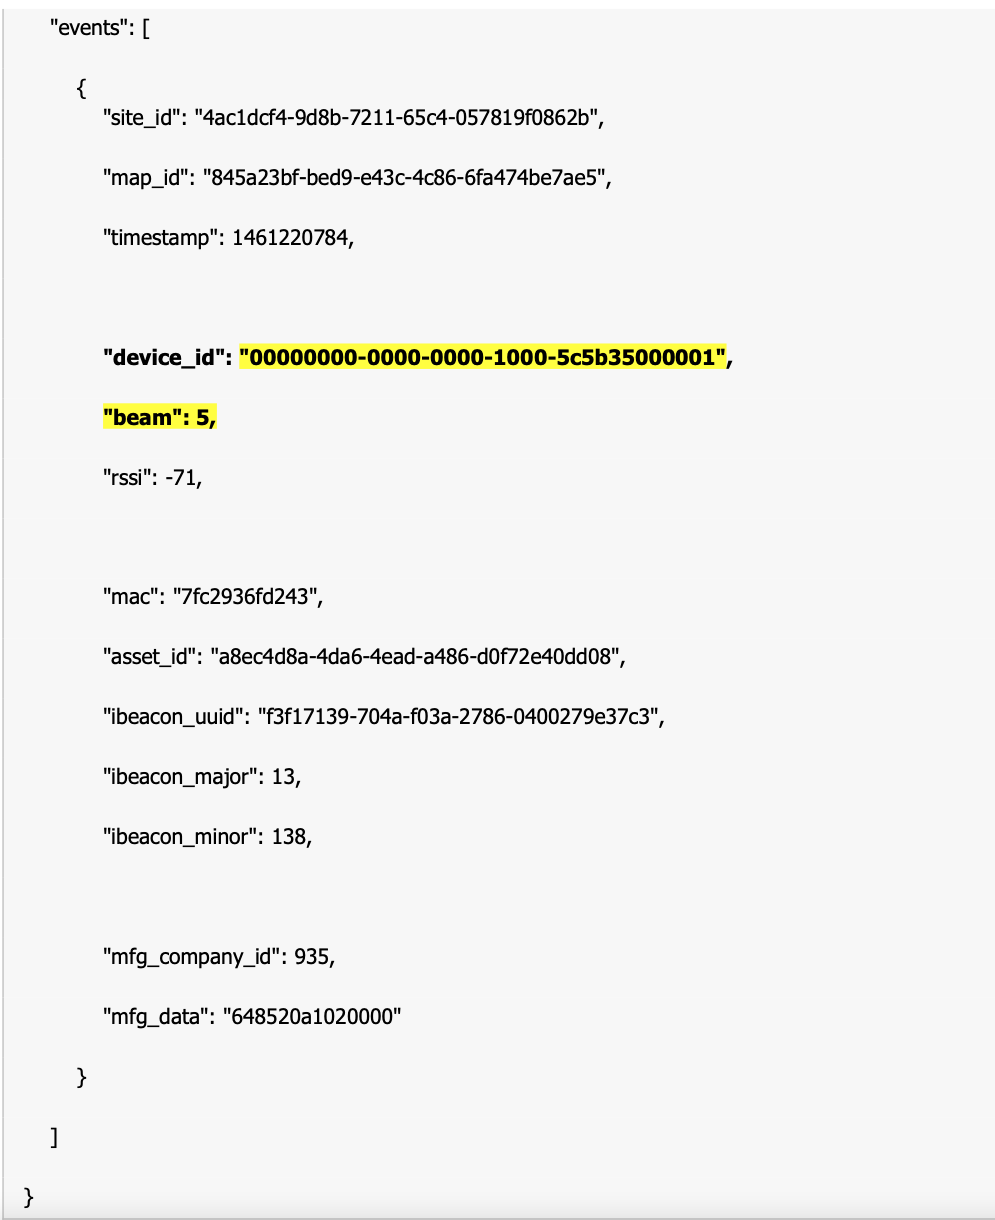
In this example we see how Locator is indentified and the format in which we need to add it on the Blyott Portal. For example "00000000-0000-0000-1000-5c5b35000001".
8. ADD AP LOCATOR ON THE BLYOTT PORTAL
Before we start, I would recommend seeing our Onboarding Handbook for more details on the Blyott Portal.
We have also created a helpdesk portal containing information about the Blyott platform which you can access in the 'How to Guides'. The Helpdesk portal contains a knowledge base where you can find all relevant information about the platform including Blyott latest API documentation. Please don’t hesitate to contact our Blyott Helpdesk for any additional questions.
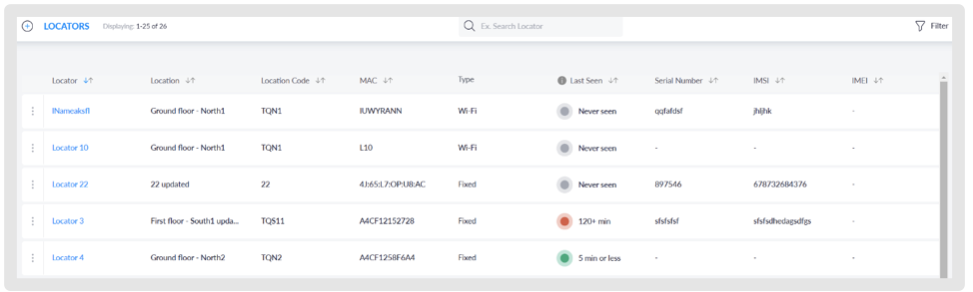
While on Blyott Dashboard, clicking on “Locators” tab on the “List Views” panel, depending on your “Access Level”, you can see locators list with information like Locator Name, Location, Location Code, MAC, Type, Last Seen, Serial Number, IMSI, IMEI.
9. ADD A NEW LOCATOR
To add new locators, click the "+" (Add Locator) button and enter the following information:
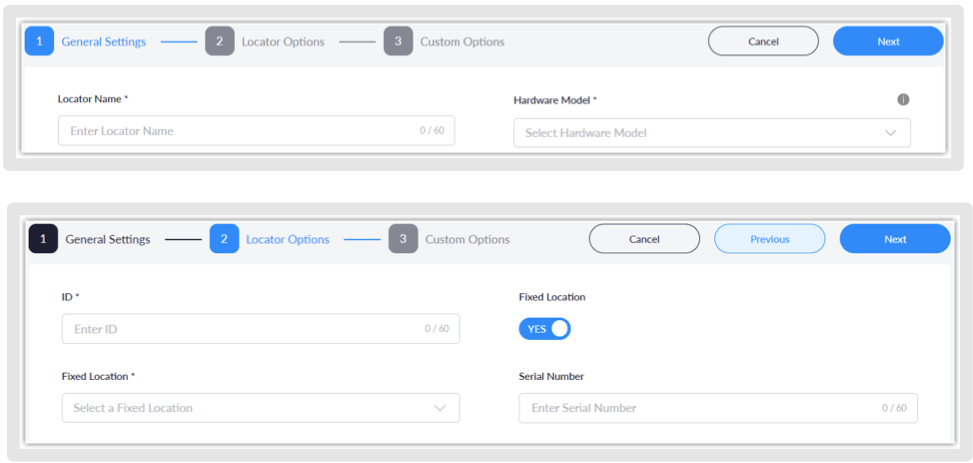
‣ Locator Name
Enter desired locator name.
‣ Hardware model
Select: “Mist | 1 antenna”. or: “Mist | 8 antennas”.
‣ ID = MAC*
Enter the MAC ID of the device in the following format: "00000000-0000-0000-1000-MAC_ADDRESS-BEAM_NUMBER"
Example: "00000000-0000-0000-1000-5C5B35000001".
‣ Fixed Location (marked YES)
You will need to create locations in the “Location” tab before you can select the Fixed Location from the dropdown list. If you already have Locations, just select the desired Location.
If importing using the template downloaded from the Portal, for the “Fixed Location”, you need to fill in the column “Location Code” (unique value of every location) to assign that Locator to a designated location.
“Type” will be Fixed
‣ Fixed Location (marked NO)
The device will have no location assigned, and the “Type” will be “Mobile”
If the type needs to be “Wi-Fi”, then you can change that by using the excel sheet template which you can download from the Locator Tab in the Blyott Portal.
‣ Serial Number
Enter the serial number of the device.
*Make sure to enter the correct MAC ID. This can be confirmed locally with your IT team and/or occasionally marked on the device. Enter the MAC address in capital
letters and without the semicolons (:).
10.1. “MIST | 8 ANTENNAS” LOCATOR ON BLYOTT PORTAL
When you add 1 locator with MIST Hardware Model type: “Mist | 8 antennas”, 8 locators are automatically created. e.g.
Enter the MAC ID of the device in the following format: "00000000-0000-0000-1000-5C5B35000001"
When you add the hardware model “Mist | 8 antennas” the 8 Locators with the same MAC address will be created on the Blyott Portal.
Please see the example below:
00000000-0000-0000-1000-5C5B35000001-1 00000000-0000-0000-1000-5C5B35000001-2 00000000-0000-0000-1000-5C5B35000001-3 00000000-0000-0000-1000-5C5B35000001-4 00000000-0000-0000-1000-5C5B35000001-5 00000000-0000-0000-1000-5C5B35000001-6 00000000-0000-0000-1000-5C5B35000001-7 00000000-0000-0000-1000-5C5B35000001-8
MIST device has 8 beams - let's imagine one MIST device with 8 beams represents 8 Locators on the Blyott Portal. One MIST Locator replaces 8 Locators within its beams - using the same MAC address + beam number (from 1 to 8) in the Blyott Portal.
Once the locator(s) have been setup and are active, they can be searched for within the platform by selecting the ‘filter’ icon from the top right corner of the screen.
10.2. ACTIVATE THE BLYOTT TAG AS AN ASSET IF NEEDED
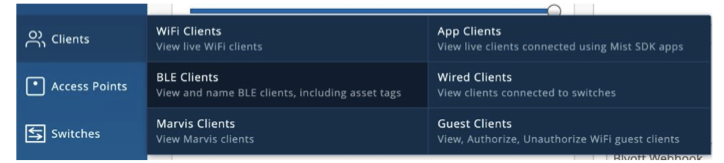
If needed, activate the Blyott sensor as an asset in the Mist platform as this is the trigger to forward data. Under “Clients” > ”BLE clients” at the MIST dashboard you can activate the sensor as an asset, optionally you can also use the API to activate the sensor to become an asset.
11. ADDITIONAL INFORMATION
11.1. MIST VBLE ARRAY EXPLAINED:
-
The Mist AP has a vBLE array, which consists of a 16 Directional Antennae Bluetooth
Array. Eight unique antennas are reflectors to help with directing the BLE energy outward away from the AP, and the other eight unique antennas are directional antennas that point in eight different directions, transmitting BLE energy in a flashlight- like fashion.
-
To better visualize this, imagine a flashlight shining narrow beams in eight different directions.
11.2. MIST AP BEAMS EXPLAINED:
-
Each AP is transmitting on eight unique directional beams.
-
The Mist SDK on the device hears these beacons from the beams and sends the RSSI
and device sensor information back to the Mist cloud. Through either wifi or cellular.
-
The more beams your device hears the more accurate your location will be, as there is
more data for the location engine to make a better location estimate.
For asset tracking, like the Blyott sensors, we listen to the output of the sensor and forward that information via the webhooks to the Blyott server. 16 antennas = 8 for listening to sensors/assets and 8 to send out data.
12. BLYOTT SUPPORT & ASSISTANCE
Within this Help Center, we aim to provide you with useful information, documentation, and guidance that will enable you to make the most out of your access to the Blyott Platform.
In the Knowledge base section you can find a video walkthrough guide for the support page, Release Notes, Documentation, Manuals, and “How To” guides.
Keep up to date with the information & articles you are interested in, by selecting the 'Subscribe' option and you will receive email updates every time we add new information.
If you have any questions or suggestions at all, please feel free to get in touch with us at helpdesk.blyott.com
Thanks and regards,
The Blyott Support Team