Create an account on www.make.com and log in to the Dashboard. Please follow the instructions to set up your Workflow to forward information to the Make Webhook.
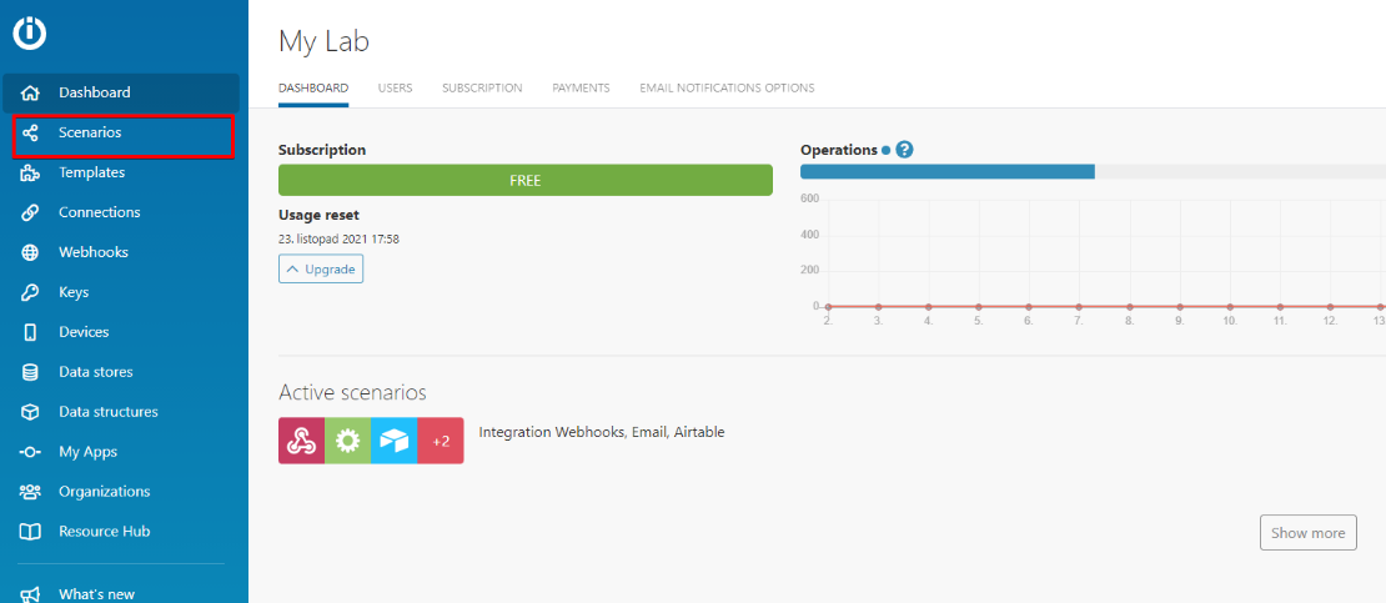
STEP 1: Click on Scenarios“.
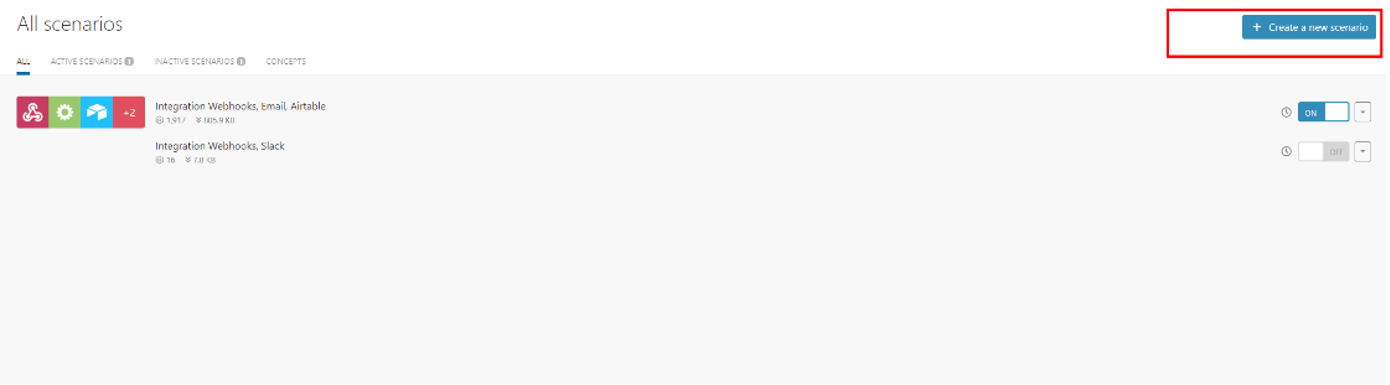
STEP 2: Click on "Create a new scenario“.
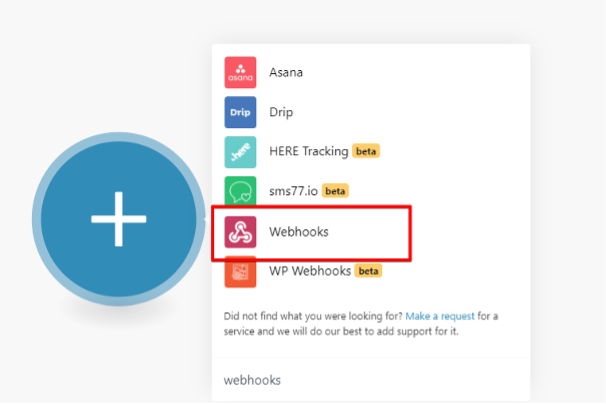
STEP 3: Click „+“ to add your module.

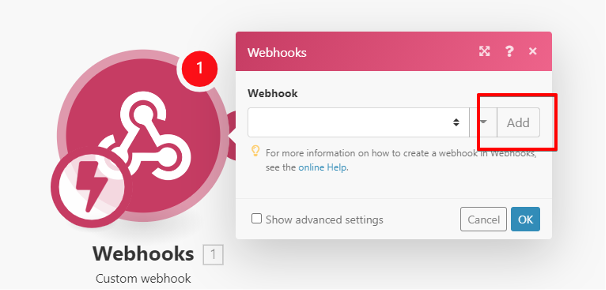
STEP 4: Search for „Webhooks“ in the search section and select it.
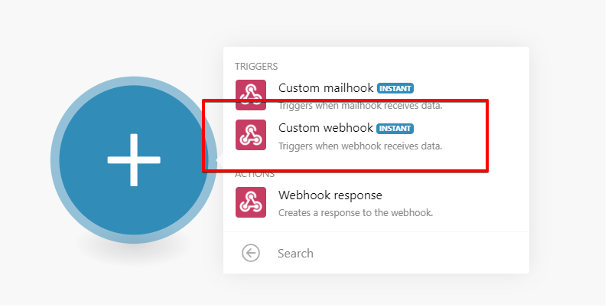
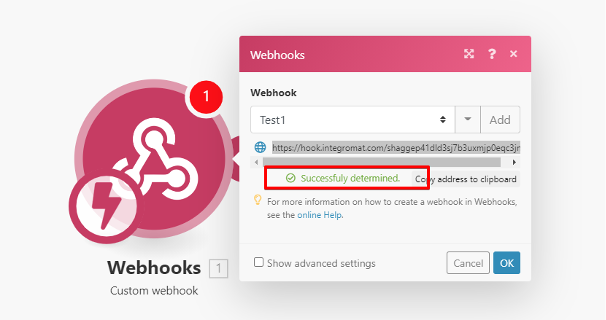
STEP 5: Pick „Custom webhook“ from the menu.
STEP 6: Click „Add“ to create your Webhook URL.
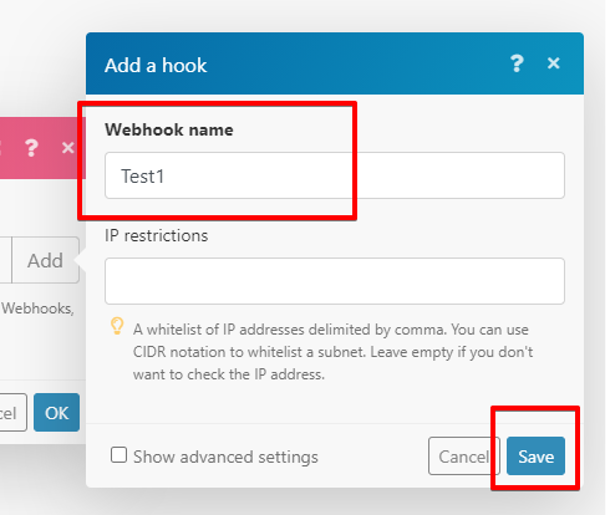
STEP 7: Fill in the desired name of your Webhook and click „Save“
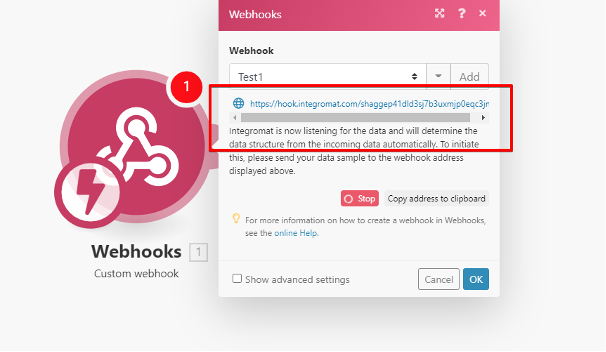
STEP 8: Copy your newly created Webhook URL from this section.
STEP 9: On Blyott Portal create a new „Workflow“ and enter copied link into „URL“.

On the „Assets“ section edit the desired asset and select the newly created „Workflow“.
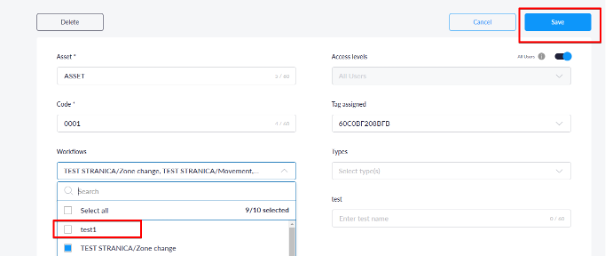
Take note, this step is important, if you do not assign Asset to Workflow, the Webhook URL will not get any payload data and will report the error.
To confirm the connection is successful, check the Make Webhook module.
If you got the green message, you have successfully connected the Make Webhook with the Blyott Workflow. The asset payload will be forwarded to this Webhook in Make. If you didn't get the green message and the Make is still spinning the „Stop“ button, this means that Make didn't receive any payload from the Asset (there were no changes on the Workflow). As soon your Asset makes the change and sends the payload, Make will connect. From here you can set certain rules and desired notifications, like for example, email alert when a certain state is registered with your Asset.
If you have any questions or suggestions at all, please feel free to get in touch with us at helpdesk.blyott.com
Thanks and regards,
The Blyott Support Team