Step 1: Create a Custom Layout for Assets
- Navigate to the 'Assets' Field: Start by accessing the 'Assets' section of the platform to begin the process of creating a custom view.

-
Search for Specific Assets: Utilize the search field to define the precise assets you wish to monitor through your report. This tool allows a wide range of criteria to suit your needs. Here are some examples, you might want to have reports from:
- All bladder scanners regardless of their location.
- Any asset with a battery level at or below 20%, ensuring timely replacement.
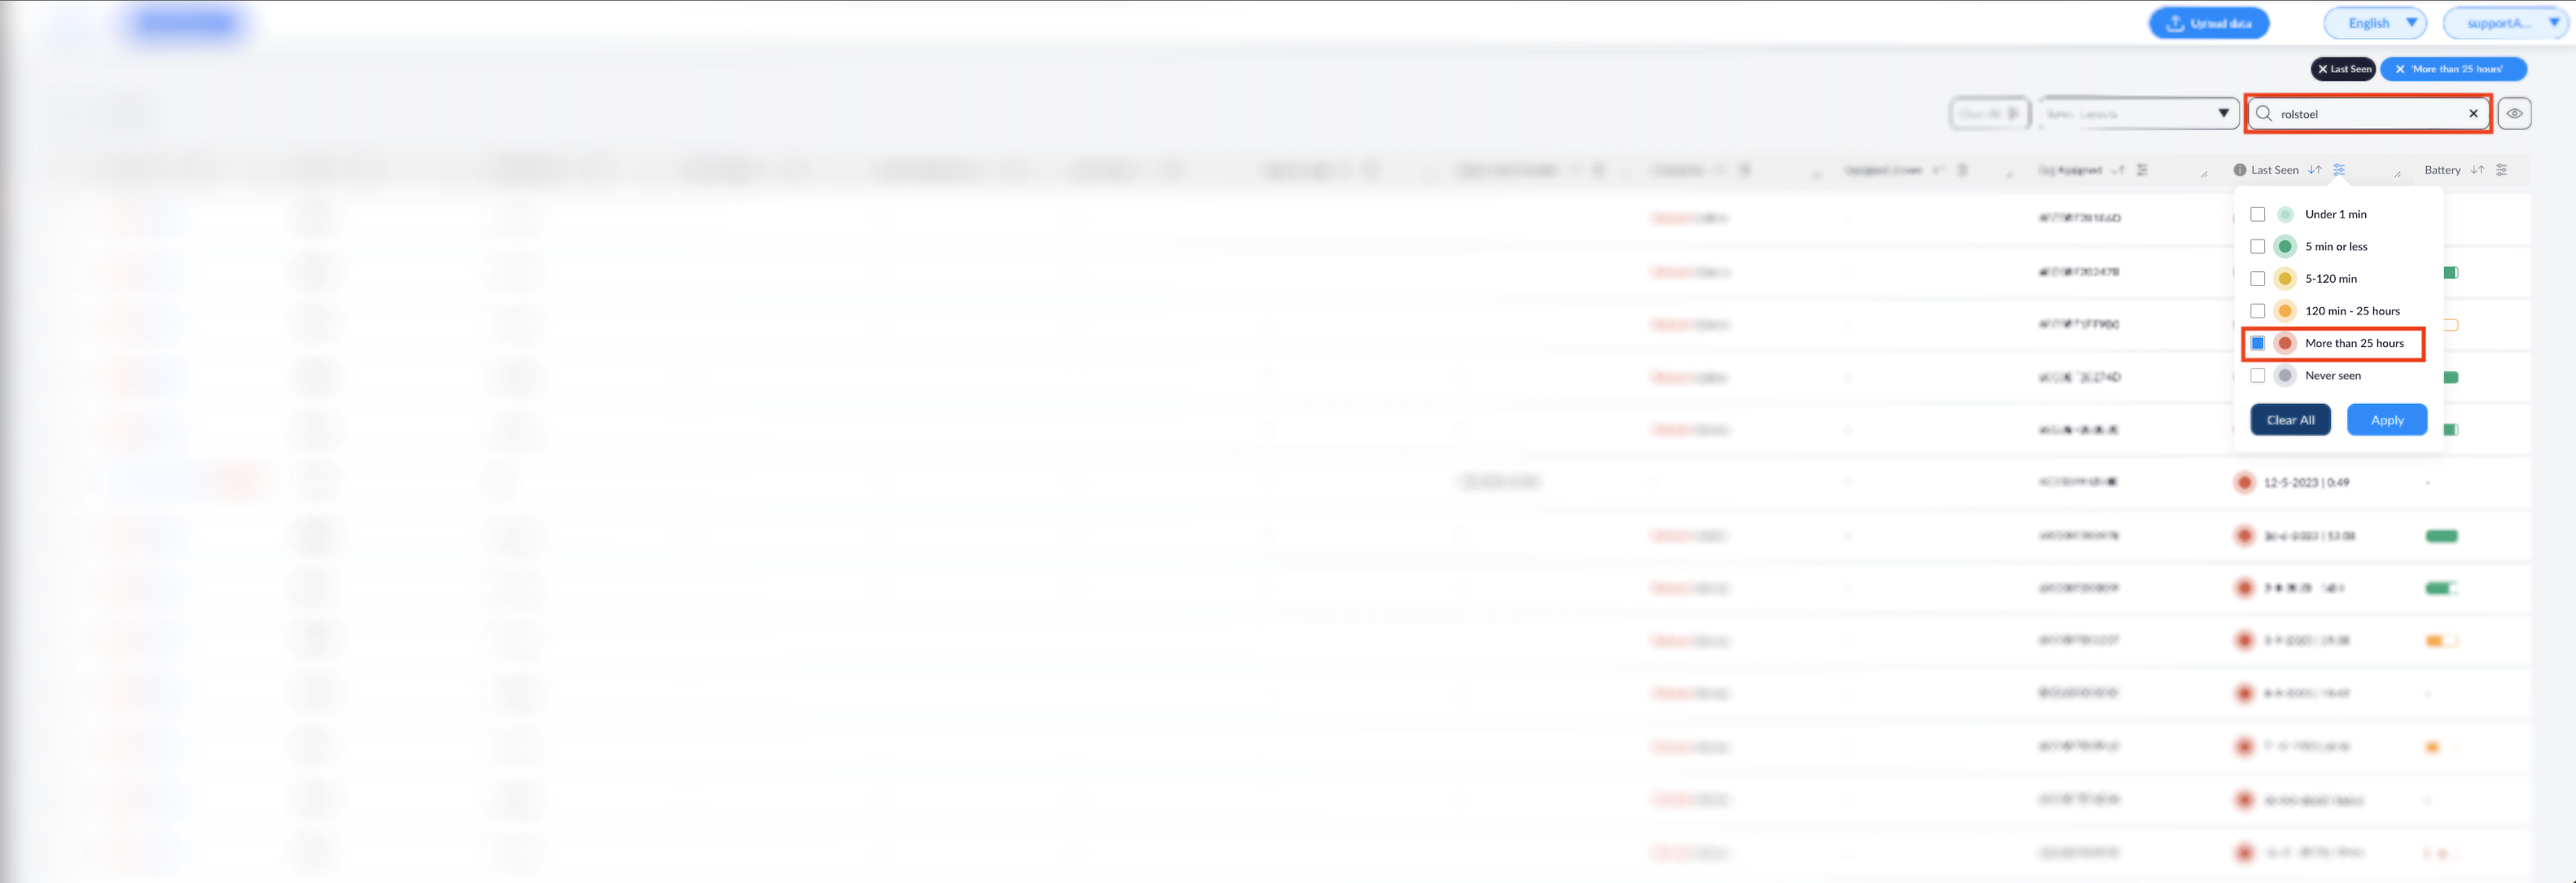
- For the purpose of our guide, we'll focus on locating all wheelchairs that haven't been checked in for 'more than 25 hours', indicating they're outside their expected zone. (see image below)

- Apply Your Search: After entering your search criteria, click on the 'Apply' button to filter the assets accordingly.
Step 2: Save Your Custom Layout
- Access Saved Layouts: Once your preferred view is visible, navigate to the 'Saved Layouts' section to proceed with saving your layout.
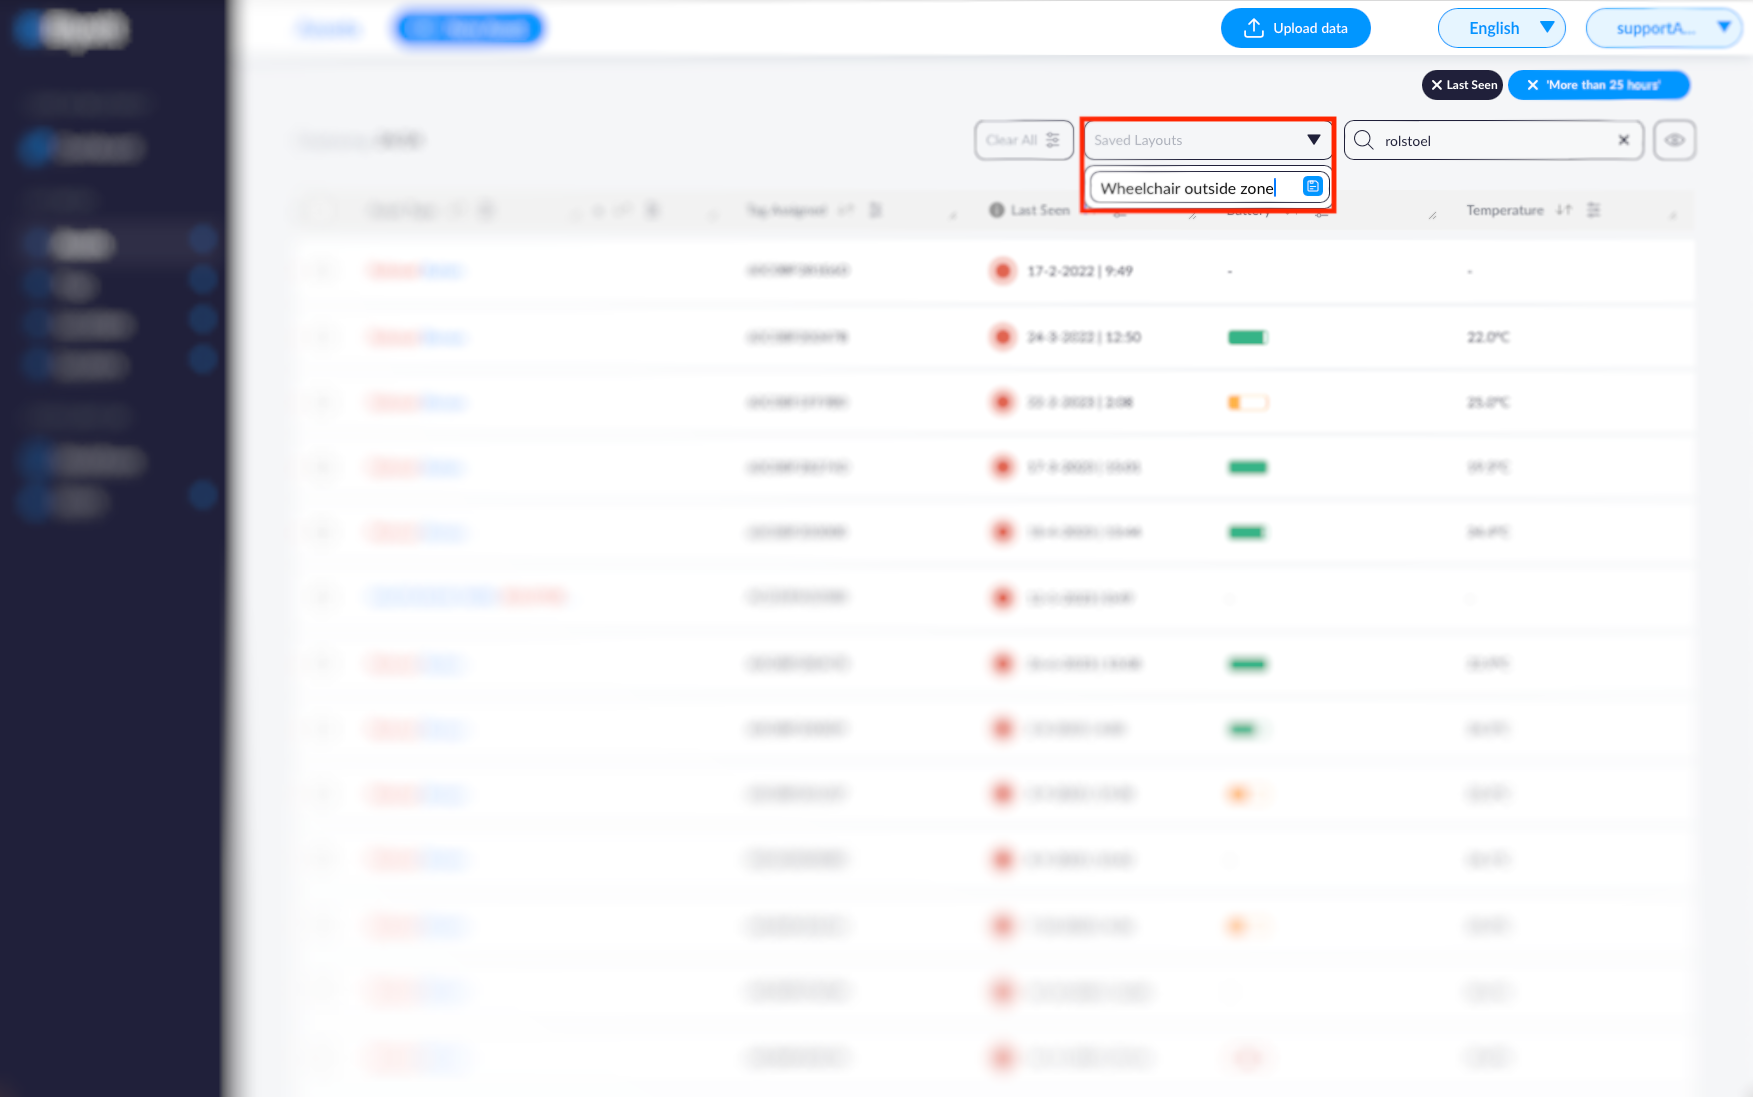
- Name Your Layout: Give your layout a descriptive name, such as 'Wheelchairs Outside Zone', to easily identify it in the future.
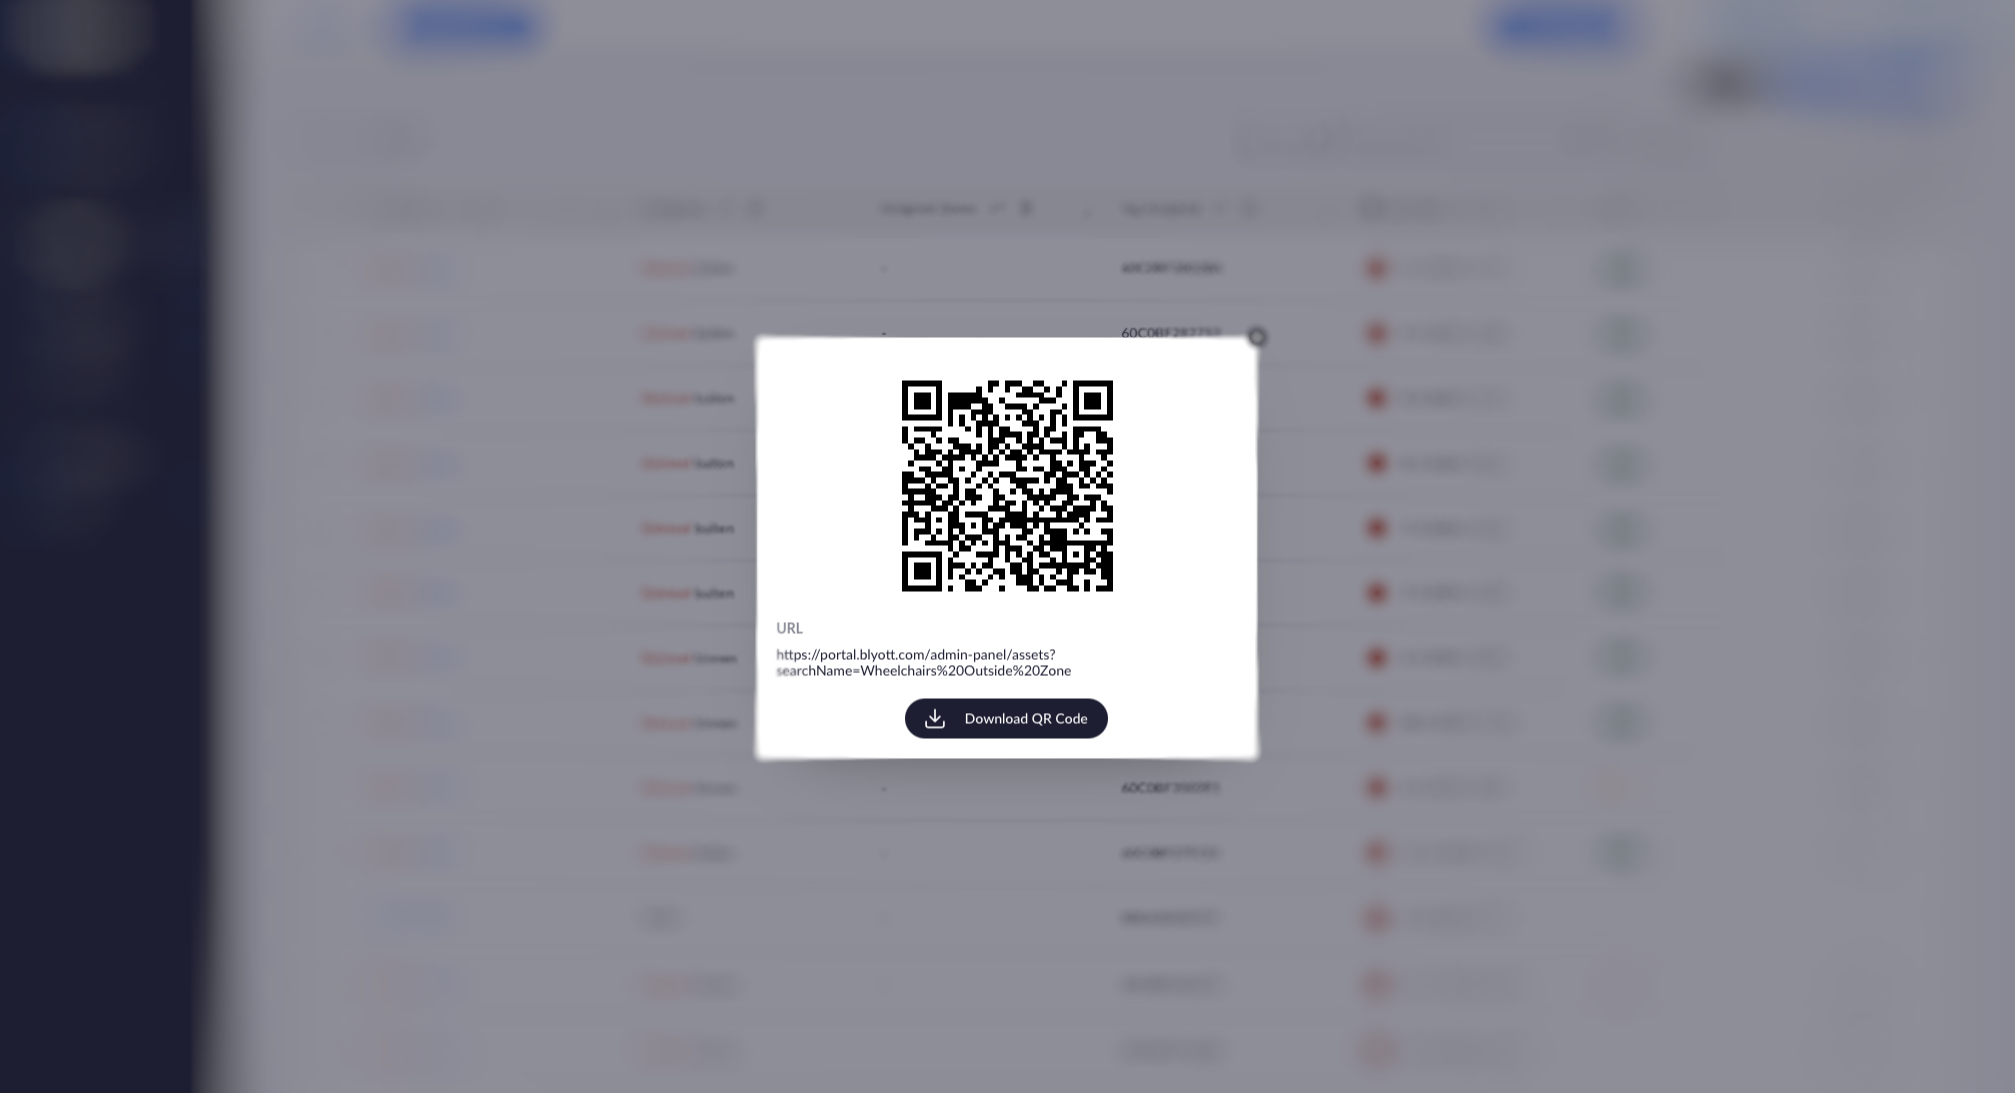
- Save the Layout: Click on the blue icon to save your layout. After saving, you will be provided with a URL link and QR code (see an example in the picture below). This can be used to quickly redirect to your custom layout without needing to repeat the search process.
Step 3: Add a Custom Report
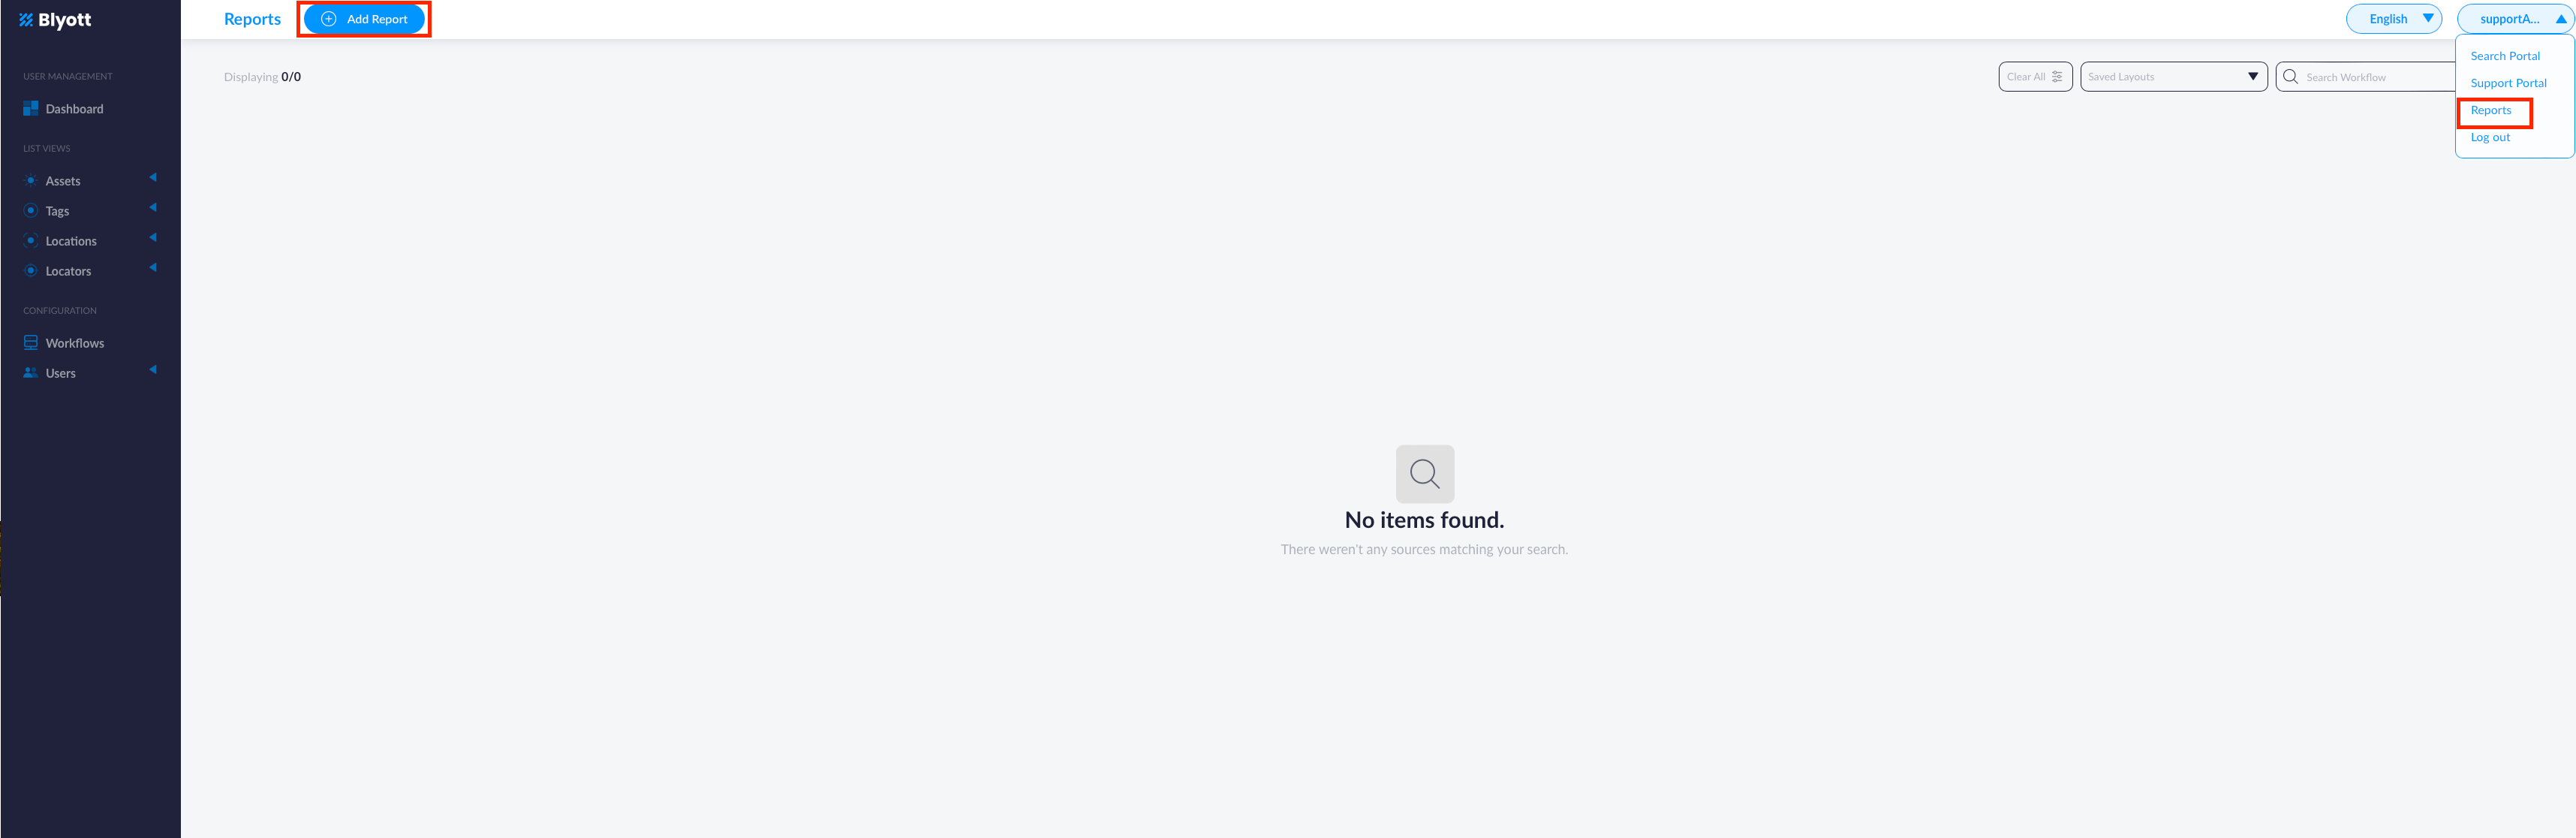
1. Go to Reports: On the top right corner, select 'Reports' and then click on the '+ Add Report' button to start configuring a new report.
- Name: Enter a name for your report, such as 'Report Wheelchairs Outside Zone'.
- Type: Select 'Assets' as the report type.
- Saved Layout: Choose the layout you previously saved, e.g., 'Wheelchairs Outside Zone'.
- Delivery Method: Decide how you wish to receive your report via E-mail or Webhooks.
- Activate Report: Toggle the 'Active' switch to activate your report and start receiving updates.
3. Detail Your Report:
- Email To: Specify the email address where you wish to receive the report.
- Start Time: Select the start time for when you want to begin receiving reports.
- Send Interval: Choose the frequency of your reports – options include daily, weekly, or monthly.
- Click on 'Save'
Following these steps will ensure you have a custom view and report tailored to your monitoring needs. Remember, you can repeat this process for any other types of assets or criteria relevant to your operations.
If you have any questions or suggestions at all, please feel free to get in touch with us at helpdesk.blyott.com
Thanks and regards,
The Blyott Helpdesk Team