1. INTRODUCTION
Within this short guide we aim to provide you with useful information and guidance how
to set up everything to log in to the Blyott Portal using Active Directory.
IMPORTANT NOTE
Before any action, you need to contact our sales team first at sales@blyott.com regarding additional expenses that might occur during this process.
Upon their confirmation, we can execute the integration.
additional expenses that might occur during this process. Upon their confirmation, we can execute the integration.
2. ACTIVE DIRECTORY FOR BLYOTT PLATFORM
Under the SSO tab in basic saml configuration you will need to provide:
Identifier (Entity ID): urn:amazon:cognito:sp:eu-west-1_ekAl9YZlw Reply URL (Assertion Consumer Service URL): https://blyott-external-idp.auth.eu-west-1.amazoncognito.com
Please don't forget to add users who will be able to sign in using that application.
After that, we will need to receive the Metadata URL from your side, which can be found under SAML Signing Certificate -> App Federation Metadata Url
3. ACTIVE DIRECTORY – CONFIGURATION STEPS
3.1. CREATE A NEW APPLICATION
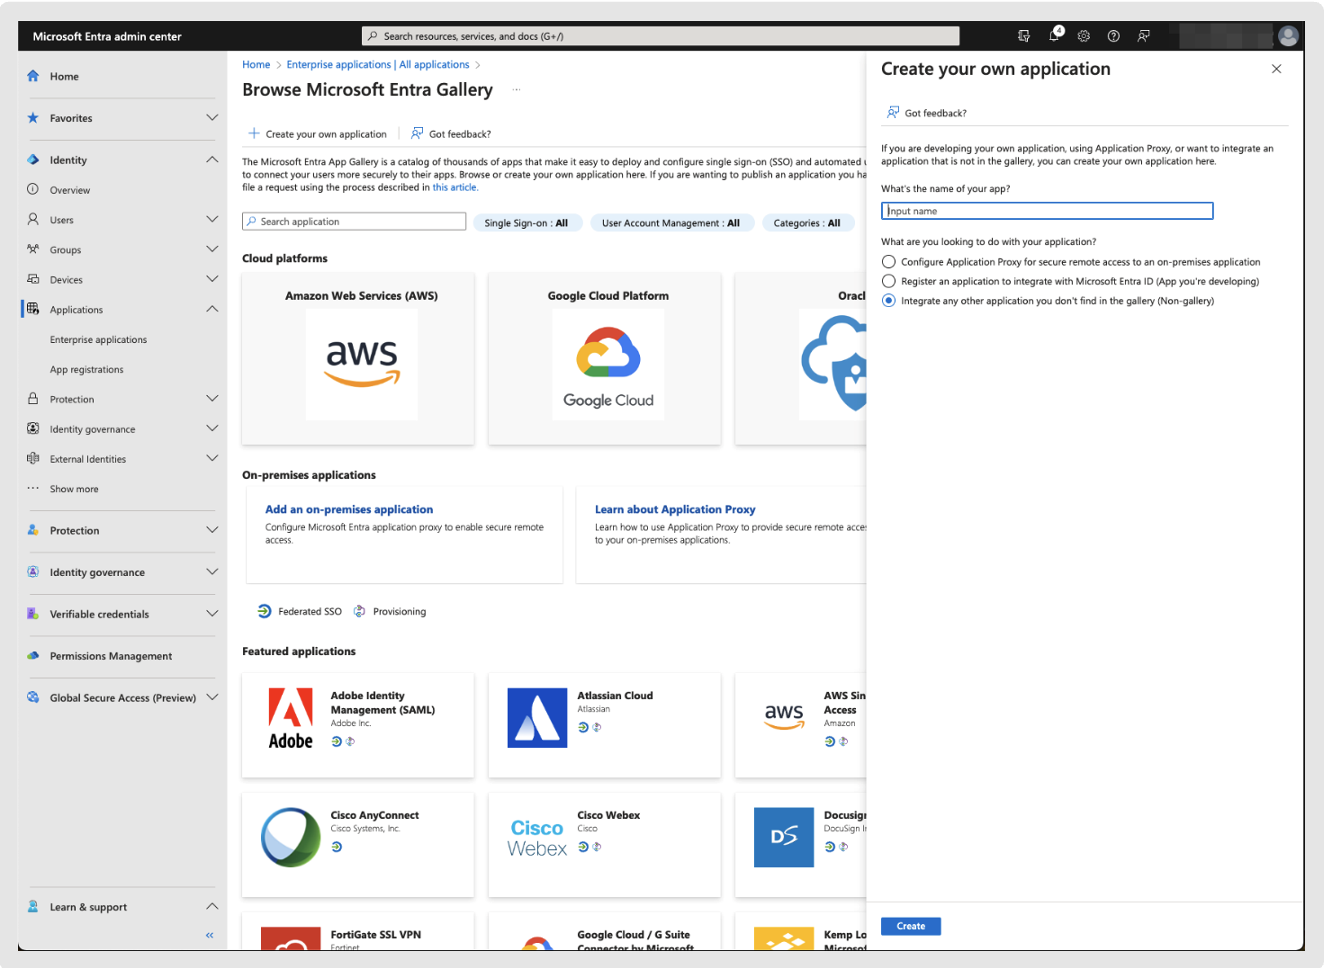
Create a new application inside your Azure Active Directory E.g. Blyott AD
3.2. SSO - SAML SETUP
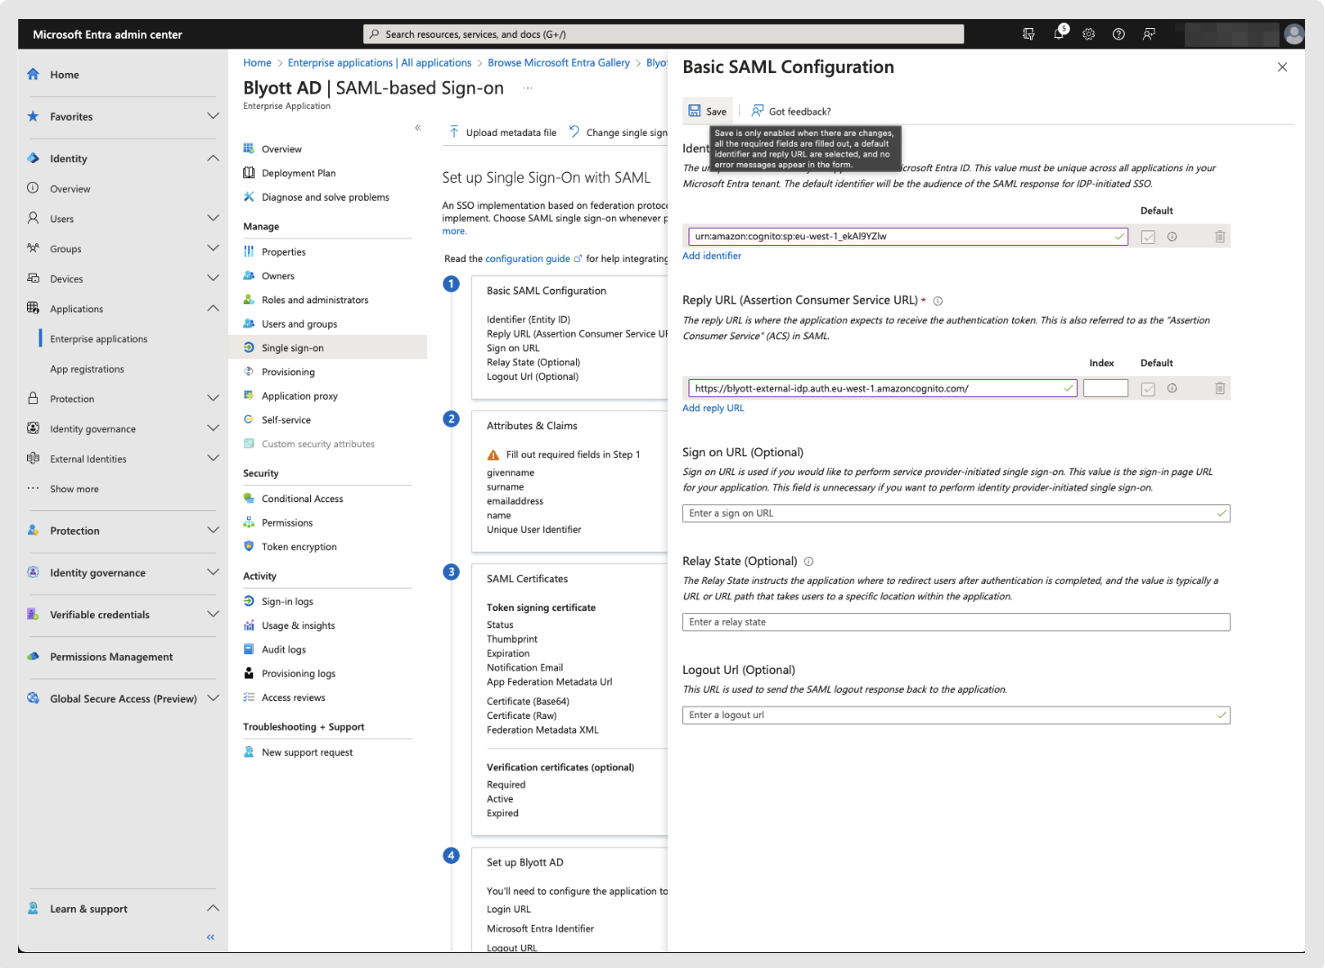
In the Applications – Enterprise applications – Single Sign On tab Please fill in the following:
- Identifier (Entity ID): urn:amazon:cognito:sp:eu-west-1_ekAl9YZlw
- Reply URL (Assertion Consumer Service URL): https://blyott-external-idp.auth.eu-west-
1.amazoncognito.com
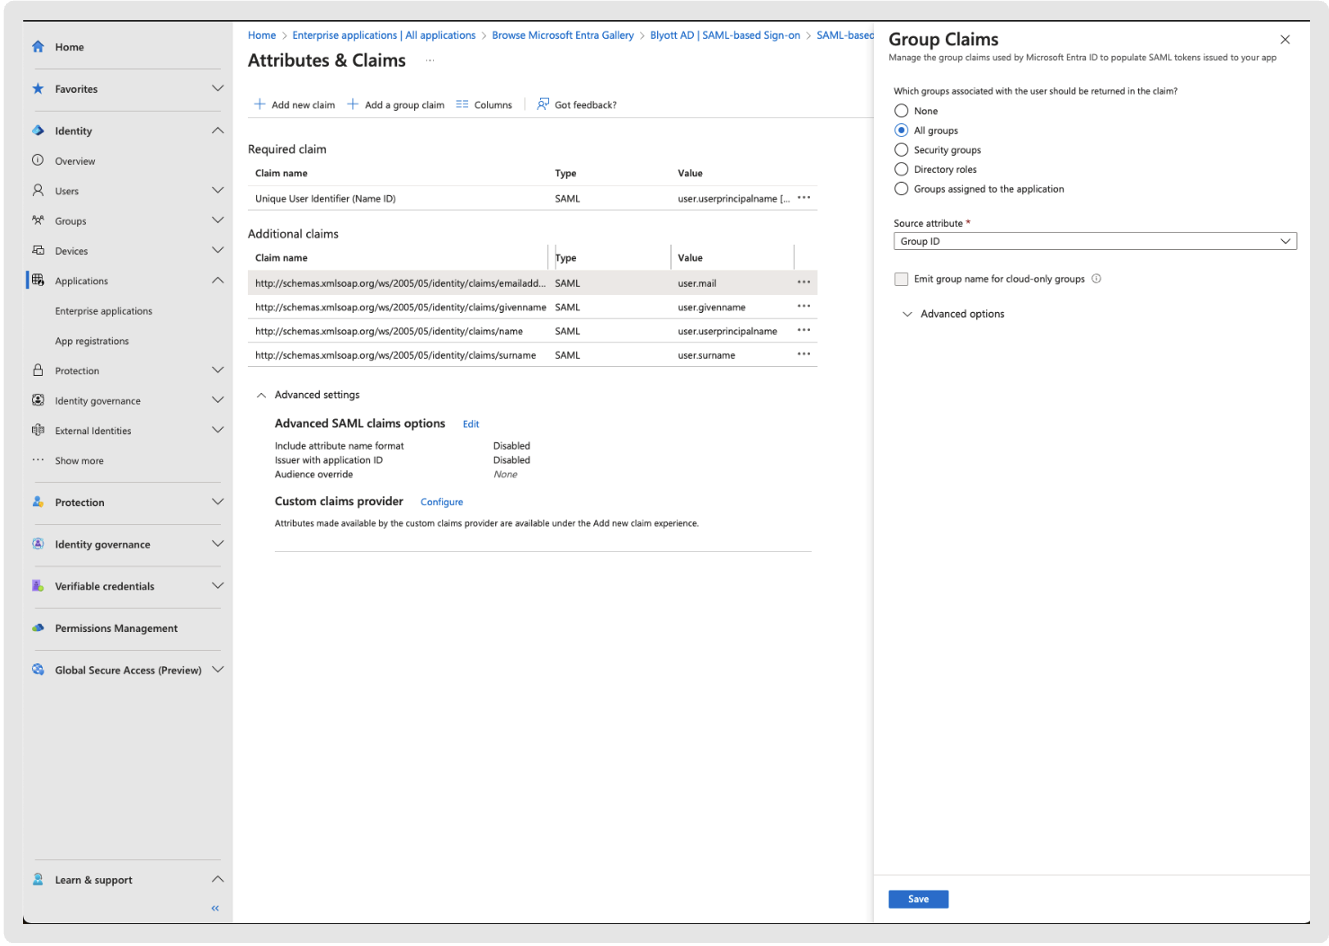
3.3. ADD GROUP CLAIMS
3.4. COPY APP FEDERATION METADATA URL
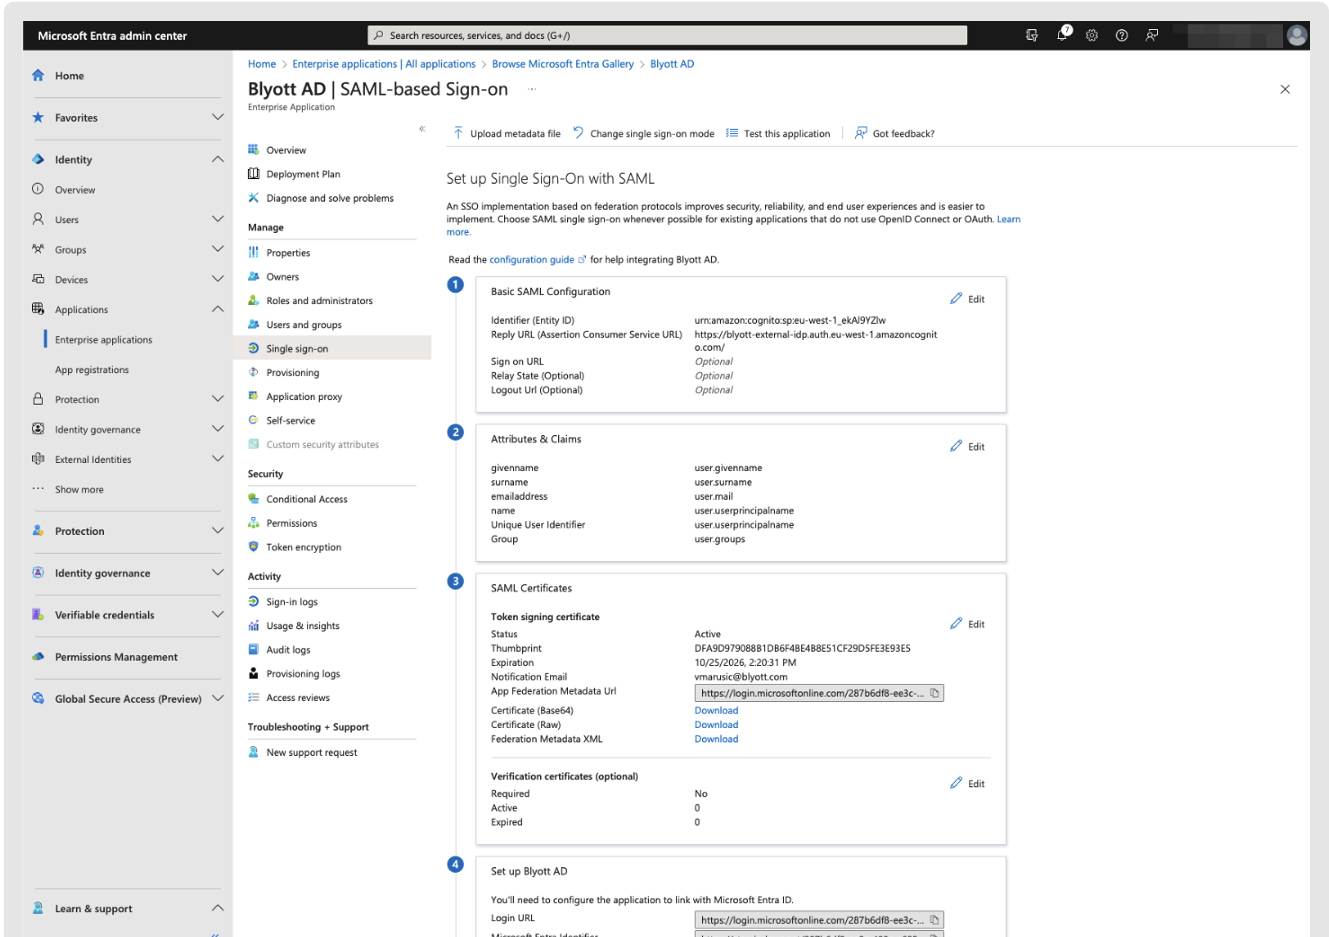
Copy the Metadata URL and email it to helpdesk@blyott.com. The support team will
handle the integration and notify you once it’s completed.
3.5. ASSIGN USERS
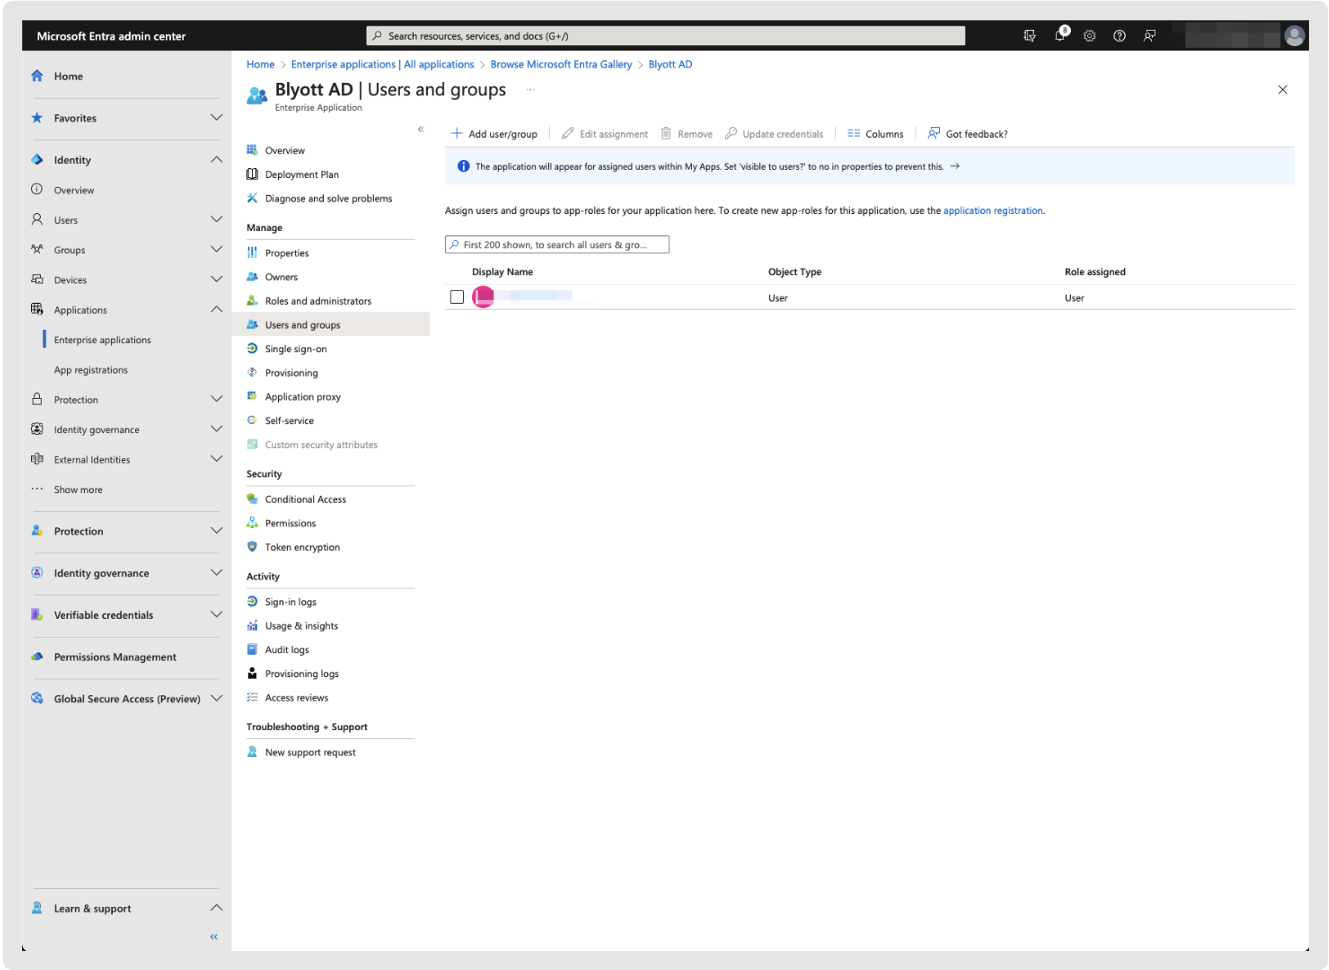
In the Users and groups tab, create and assign all relevant users and groups to the appropriate
app roles.
3.6. CONFIGURATION INSIDE THE BLYOTT BUSINESS DASHBOARD
3.6.1. HOW TO CONFIGURE A GROUP INSIDE BLYOTT
• To correctly set up the Blyott – AD integration, follow these steps Create a group in AD:
o E.g. One for Admin users.
• Add the relevant users in AD to the group. Ensure that this group have access to the AD
Enterprise application created for the AD <> Blyott integration, and that no other
users/groups have access.
• Due to Technical limitation, the number of groups assigned to a user should be below
50
• Each group in AD will have a unique Object ID/key.
In Blyott, create a new SAML mappings (refer to the attached image for clarification):

• SAML department mapping for admin users:
o Department name could be, for example, "Organisation A admin users."
o Object key is the ID of the AD Admin users group.
o Access level: Full access (or the applicable access level).
3.6.2. COMMON USAGE SCENARIOS
In this chapter, we explore various common scenarios that organisations typically wish to set
up and provide guidance on how to configure them within the Blyott Business Dashboard. For
more detailed information on configuring access levels and additional scenarios for access
levels, please refer to the following link Managing Access Levels.
To help guide you in determining which user groups need to be added for your organisational
needs, refer to the following persmission matrix:
| Permissions | Administrator | UserPlus | User |
| Access to the Search Portal | ✔️ | ✔️ | ✔️ |
| Add/Change/Delete Sensors | ✔️ | ✔️ | |
| Add/Change/Delete Assets | ✔️ | ✔️ | |
| Link Sensors to Assets | ✔️ | ✔️ | |
| Build/Edit/Access Reports | ✔️ | ✔️ | |
| Create/Edit/Delete Users | ✔️ | ||
| Create/Edit/Delete UserPlus | ✔️ | ||
| Create/Edit/Delete Custom Fields | ✔️ | ||
| Create/Edit/Delete Webhooks | ✔️ | ||
| Create/Edit/Delete Locations | ✔️ | ||
| Create/Edit/Delete Locators | ✔️ | ||
| Access to insights | ✔️ | ||
| Create/Edit/Delete Asset Manuals | ✔️ |
Scenario 1: Administrators and Users
Objective:
Set up a configuration where Users have full control (Administrators), while others have “read-only” rights.
Setup:
-
Create Groups in Active Directory (AD):
-
Create two groups in AD:
-
One for Read-Only users.
-
One for Admin users.
-
-
Add the relevant users in AD to each group. Ensure that these groups have access to the AD Enterprise application created for the AD <> Blyott integration, and that no other users/groups have access.
-
-
Group Assignment Limitation:
-
Important: Due to a technical limitation, the number of groups assigned to a user should be below 50.
-
-
Configure SAML Mappings in Blyott:
-
In Blyott, create two new SAML mappings for the groups created in AD:
-
SAML Department Mapping for Regular Users:
-
Department name: e.g., “Organisation A regular users”
-
Object key: ID of the AD Read-Only users group
-
Access level: Full access (or the applicable access level)
-
Role: Users
-
-
SAML Department Mapping for Admin Users:
-
Department name: e.g., “Organisation A admin users”
-
Object key: ID of the AD Admin users group
-
Access level: Full access (or the applicable access level)
-
Role: Admin
-
-
-
Scenario 2: Administrators, UserPlus, and Users
Objective:
Set up a configuration where Administrators have full control, UserPlus have extended capabilities, and Users have “read-only” rights.
Setup:
-
Create Groups in Active Directory (AD):
-
Create three groups in AD:
-
One for Read-Only users (Users).
-
One for UserPlus with extended privileges.
-
One for Admin users (Administrators).
-
-
Add the relevant users in AD to each group. Ensure that these groups have access to the AD Enterprise application created for the AD <> Blyott integration, and that no other users/groups have access.
-
-
Group Assignment Limitation:
-
Important: Due to a technical limitation, the number of groups assigned to a user should be below 50.
-
-
Configure SAML Mappings in Blyott:
-
In Blyott, create three new SAML mappings for the groups created in AD:
-
SAML Department Mapping for Regular Users:
-
Department name: e.g., “Organisation A regular users”
-
Object key: ID of the AD Read-Only users group
-
Access level: Full access (or the applicable access level)
-
Role: Users
-
-
SAML Department Mapping for UserPlus:
-
Department name: e.g., “Organisation A UserPlus”
-
Object key: ID of the AD UserPlus group
-
Access level: Full access (or the applicable access level)
-
Role: UserPlus
-
-
SAML Department Mapping for Admin Users:
-
Department name: e.g., “Organisation A admin users”
-
Object key: ID of the AD Admin users group
-
Access level: Full access (or the applicable access level)
-
Role: Admin
-
-
-
4. Common Issues
When setting up the Blyott – AD integration, several common issues can prevent successful login:
-
Too Many Group Memberships:
Being a member of too many groups in AD can cause conflicts or exceed group limitations, preventing login. -
Incorrect Group Configuration:
If the AD groups are not correctly configured, or if the Object ID/key is not properly mapped in Blyott, users may not receive the correct access levels. Double-check each group setup and confirm that the mappings in Blyott correspond accurately to the AD groups. -
Missing Group Claims:
Forgetting to add group claims in the SAML setup can result in users not being recognized by the Blyott system. Always include all necessary group claims during the SSO – SAML setup. -
Insufficient Permissions:
Ensure that the AD groups have been granted the appropriate permissions (User, UserPlus, or Administrator) to access the Blyott integration. Lack of proper permissions can block users from accessing the platform.
5. BLYOTT SUPPORT & ASSISTANCE
Within this Help Center, we aim to provide you with useful information, documentation, and guidance that will enable you to make the most out of your access to the Blyott Platform. In the Knowledgebase section you can find a video walkthrough guide for the support page, Release Notes, Documentation, Manuals, and “How to” guides.
Please be reminded that you need to register/log in to the support page to access all Blyott-related documentation.
For everything else do not hesitate to contact us at support@blyott.com.
Thank you for your attention.
The Blyott Support Team