-
INTRODUCTION
Welcome to the Cisco configuration guide. Within this guide, we aim to provide you with useful information and guidance to make the connection to Blyott using Cisco AP devices. Before we show you how to configure the Bloytt part, Cisco has short technical documentation on how to set up Cisco devices to start scanning for the BLE Sensors.
2. CISCO BLE SCAN SETUP
To enable BLE support on the Cisco WLAN controller you need access to a Proxy Locator ON-SITE or via a site-to-site VPN to our Central Proxy Locator.
After receiving the end-point information, the commands below will configure the WLAN controller and Access Points to start scanning for BLE Sensors in the surroundings.
2.1. Commands
wlc01a#conf t
Enter configuration commands, one per line. End with CNTL/Z.
wlc01a(config)#netconf-yang
wlc01a(config)#ap profile MY_PROFILE_NAME
wlc01a(config-ap-profile)#ble scan
wlc01a(config-ap-profile)#end
wlc01a(config)#telemetry ietf subscription 1090
wlc01a(config-mdt-subs)#encoding encode-kvgpb
wlc01a(config-mdt-subs)#filter xpath /wireless-ble-ltx-oper:ble-ltx-oper-data/ble-ltx-ap-streaming
wlc01a(config-mdt-subs)#source-address X.X.X.X
wlc01a(config-mdt-subs)#stream yang-push
wlc01a(config-mdt-subs)#update-policy periodic 6000
wlc01a(config-mdt-subs)#stream yang-push
wlc01a(config-mdt-subs)#receiver name blyott-ble
wlc01a(config-mdt-subs)#exit
wlc01a(config)#telemetry receiver protocol blyott-ble
wlc01a(config-mdt-protocol-receiver)#host ip-address Y.Y.Y.Y.Y 8005
wlc01a(config-mdt-protocol-receiver)#protocol grpc-tcp
wlc01a(config-mdt-protocol-receiver)#exit
wlc01a(config)#exit
2.2. Fields
MY_PROFILE_NAME Your existing AP profile name to which group you want to enable the BLE scan
X.X.X.X Source IP of your AP Wi-Fi controller
Y.Y.Y.Y IP of our Proxy Locator server that will receive the BLE scan info
3. ADD AP LOCATOR ON THE BLYOTT PORTAL
Before we start, I would recommend seeing our Onboarding Handbook for more details on the Blyott Portal.
We have also created a support portal containing information about the Blyott platform which you can access here. The support portal contains a knowledge base where you can find all relevant information about the platform including Blyott latest API documentation.
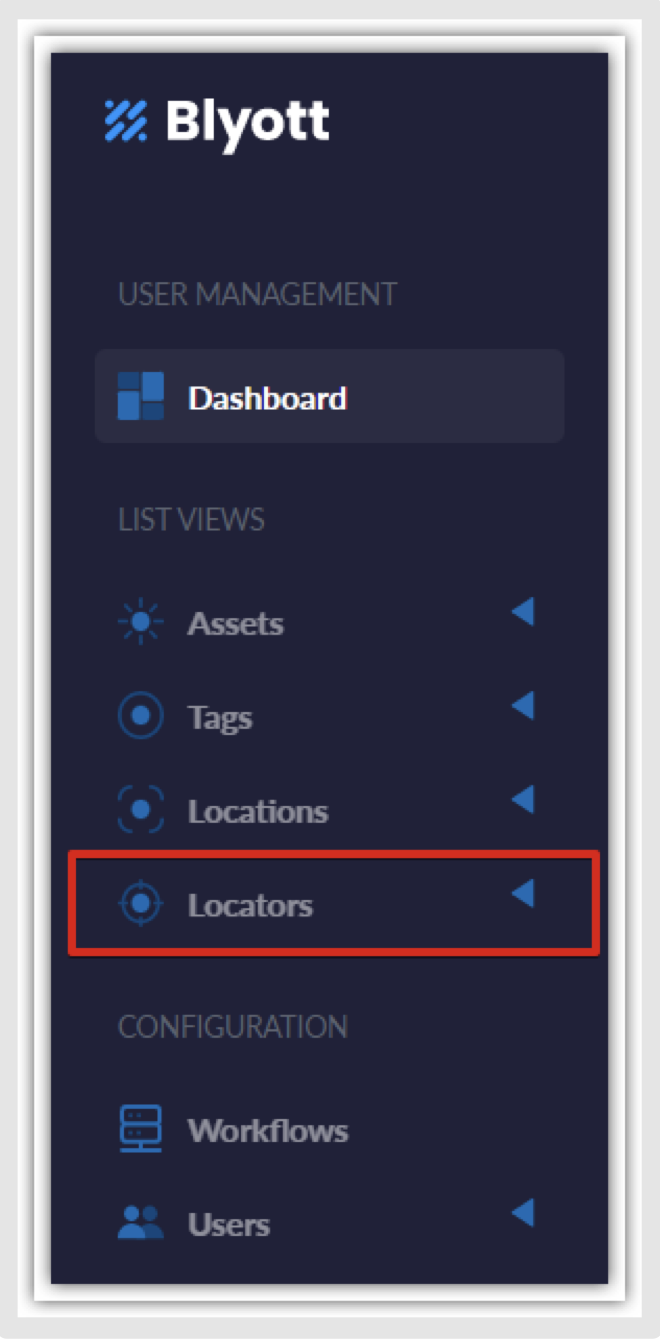
Select the “Locators” tab from the “List Views” panel (take note that different screen sizes change the panel’s layout; on smaller screens, the panel will be on the right side because of the responsiveness of the webpage - RWD).
4. ADD A NEW LOCATOR
To add Locator, click on “+ New Locator” button from the top left corner of the screen.

Fill in all data fields. The data fields marked with “*” are mandatory while others are optional.

- Locator Name
Enter desired locator name. - Hardware model
Select: “Cisco Catalyst” - ID = MAC*
Enter the “Radio MAC” address of the AP (not BLE or Ethernet).
Fixed Location (marked YES)
You will need to create locations in the “Location” tab before you can select the Fixed Location from the dropdown list. If you already have Locations, just select the desired Location.
If importing using the template downloaded from the Portal, for the “Fixed Location”, you need to fill in the column “Location Code” (unique value of every location) to assign that Locator to a designated location.
“Type” will be Fixed - Fixed Location (marked NO)
The device will have no location assigned, and the “Type” will be “Mobile”
If the type needs to be “Wi-Fi”, then you can change that by using the excel sheet template which you can download from the Locator Tab in the Blyott Portal.
- Serial Number
Enter the serial number of the device(optional).
*Make sure to enter the correct MAC ID. This can be confirmed locally with your IT team and/or occasionally marked on the device. Enter the MAC address in capital letters and without the colon (:).
5. BLYOTT SUPPORT & ASSISTANCE
Within this Help Center, we aim to provide you with useful information, documentation, and guidance that will enable you to make the most out of your access to the Blyott Platform. In the Knowledgebase section, you can find a video walkthrough guide for the support page, Documentation, Manuals, and “How to” guides.
Please be reminded that you need to register/log in to the support page to access all Blyott-related documentation.
If you have any questions or suggestions at all, please feel free to get in touch with us at helpdesk.blyott.com
Thanks and regards,
The Blyott Support Team