1. INTRODUCTION
Welcome to the ARUBA configuration guide. Within this guide, we aim to provide you with useful information and guidance to make the connection to Blyott using ARUBA AP devices. Before we show you how to configure the Bloytt part, ARUBA has technical documentation for configuring IoT. Please see this link which can already give you some insight into the setup of the network. For generic purposes, you can always point to this link for additional information on Aruba.
IMPORTANT NOTE: This guide only applies for Aruba SW 8.7. or lower using the “telemetry-HTTPS” method. For versions 8.8. or higher please follow this guide using the “telemetry-WebSocket” method.
2. ARUBA INFRA CONFIGURATION
2.1. CONFIGURE PROFILE IN “TRANSPORT STREAMS”
-
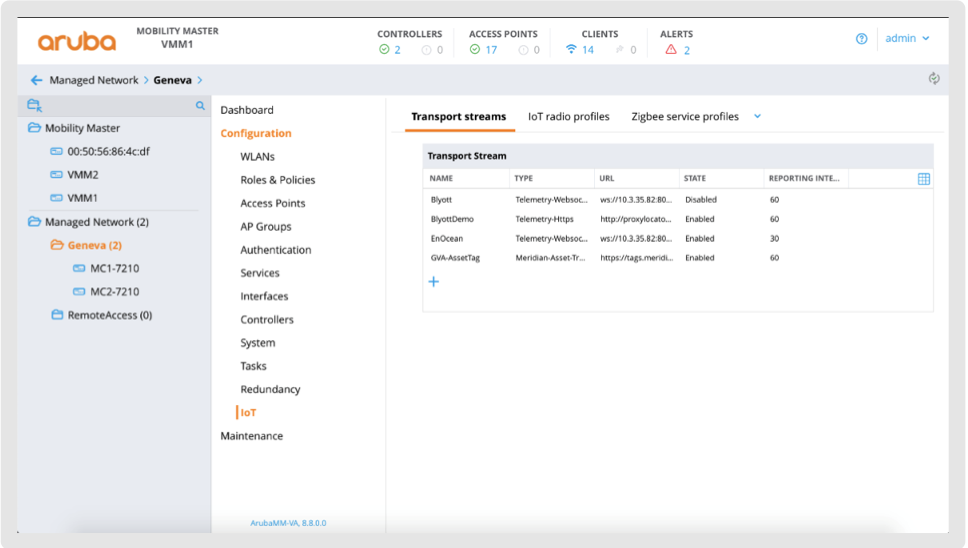
Connect to the Mobility Master.
-
Select the hierarchy level where you want to set up Blyott integration.
-
In the “Configuration” section, select “IoT”.
-
From the “Transport streams” add a new profile “BlyottDemo” by clicking on “+”.
-
“State” needs to be “Enabled.”
-
“Server type” needs to be “Telemetry-Https”.
-
Fill the “Server URL”, with the following: wss://proxylocator.blyott.com/aruba/{TO_BE_PROVIDED_BY_BLYOTT}
-
“Device classes” needs to be selected “all”.
-
“Reporting interval” needs to be “60” seconds.
-
“RSSI reporting format” needs to be “average”.
-
“Environment type” is up to your preferences.
⊲ Configure the profile as shown in the following snapshot.
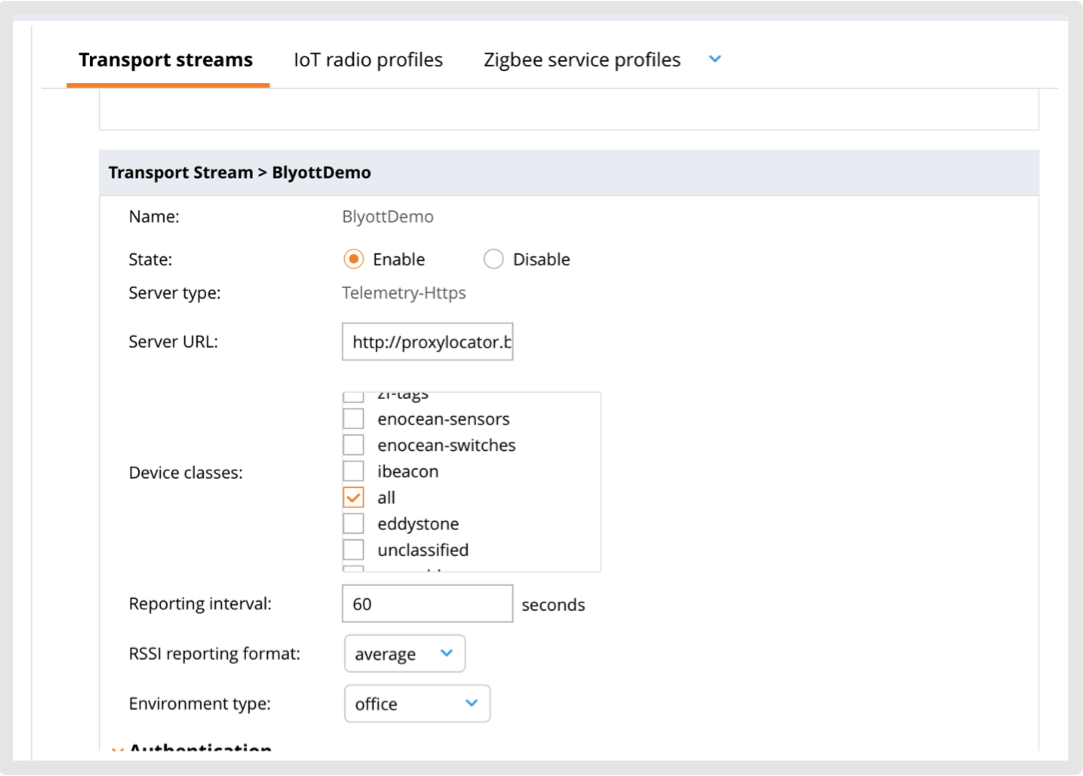
In future release we should be able to filter based on device class “blyott” but as for now we must send all devices data.
2.2. AUTHENTICATION METHOD
-
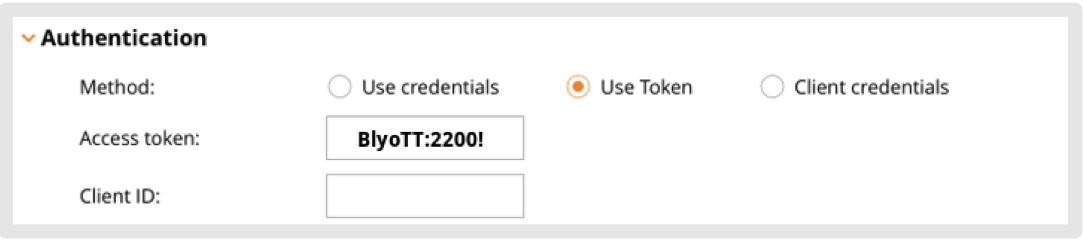
In “Authentication” section, as is it mandatory, select “Use Token”.
-
Fill “BlyoTT:2200!” in the “Access Token” field.
NOTE: Do not forget to select the AP group where to deploy the Transport Profile.

2.3. IOT RADIO PROFILES
Now let us be sure that the embedded BLE in the APs are well configured to scan for BLE tags.
-
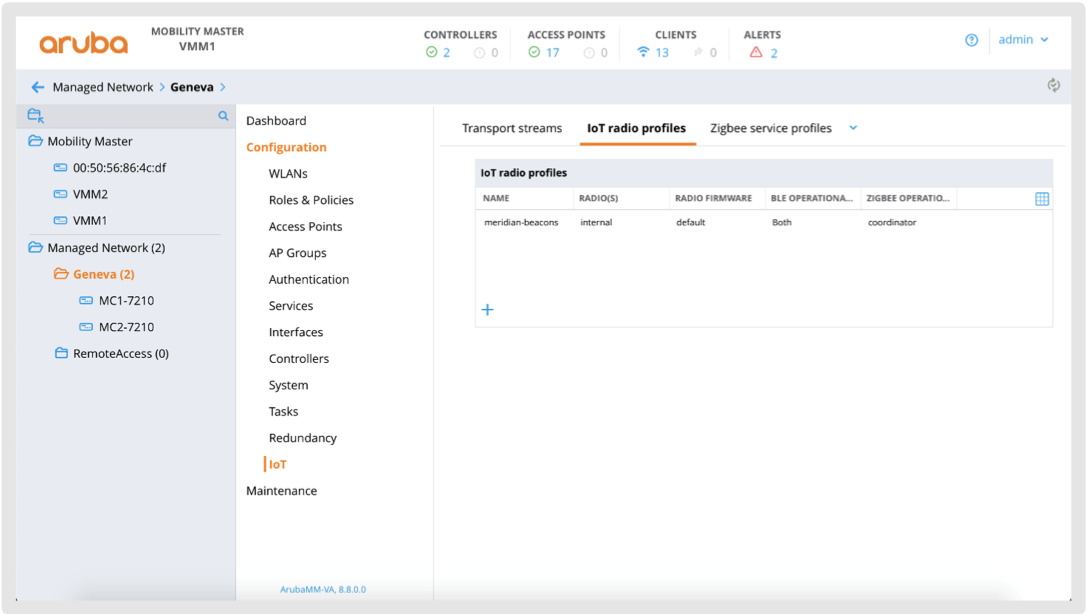
Select “IoT radio profiles” tab.
-
Click on “+” to add a new profile or edit a profile if you already use one.
 .
.
-
Check that “BLE” is selected in the “Radio mode”.
-
Check that “Both” is selected in the “BLE operational mode”.
-
For Tx Power, in this test setup we use -12dBM but this value can be adjusted
depending on your setup / coverage and needs.
IMPORTANT NOTE: The Radio Profile must be selected in the “AP group configuration”.
2.4. AP GROUP CONFIGURATION
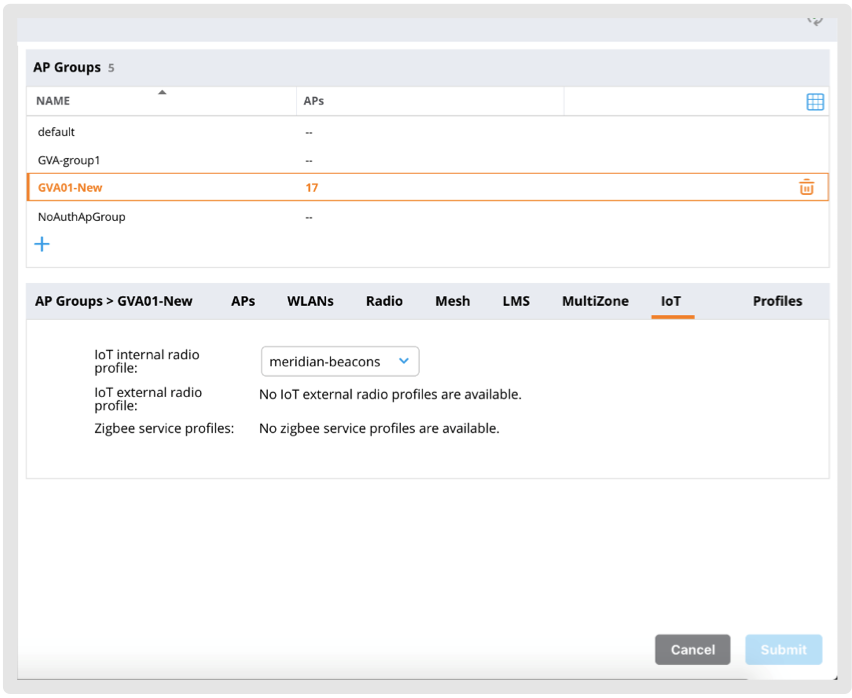
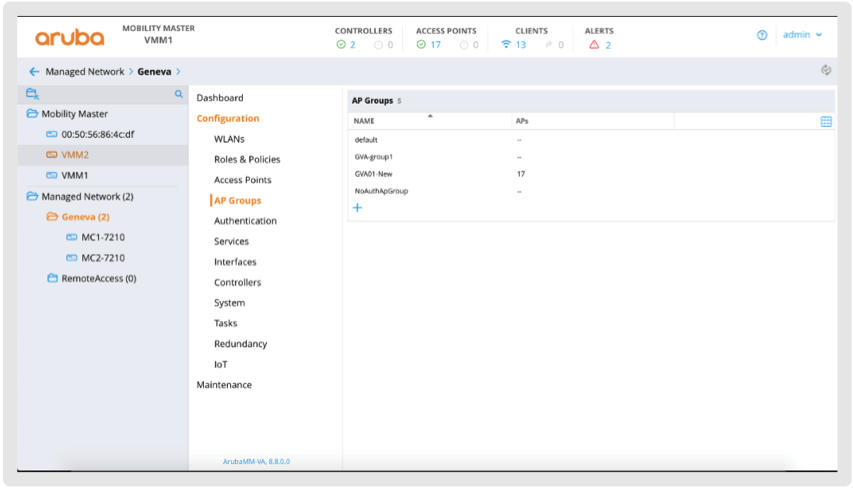
• Select the “AP group” where you want to use the Radio Profile, then select the “IoT” tab and in the “IoT internal Radio Profile", be sure that the profile you just created / modified is selected.
3. CHECK EVERYTHING IS SET ON ARUBA SIDE
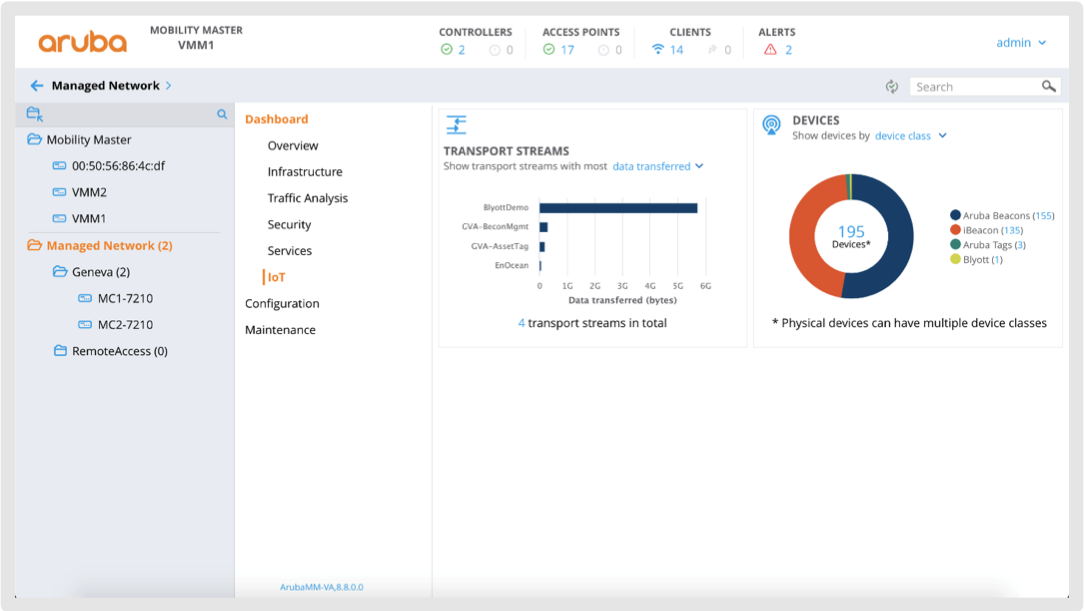
From AOS 8.8, there is now an “IoT” dashboard in the Web UI. There you can see the IoT devices seen by the APs, and that messages are sent through your Transport Profile (you must be on top of the hierarchy of Managed Network).

In previous releases, you can use the CLI to verify the APs see the tags.
-
Connect to the Mobility Master.
-
Go to the controller which managed the AP which should see the tags: ⊲ cd <your_controller>
• Connect to the controller: ⊲ mdconnect
• Enter the following command:
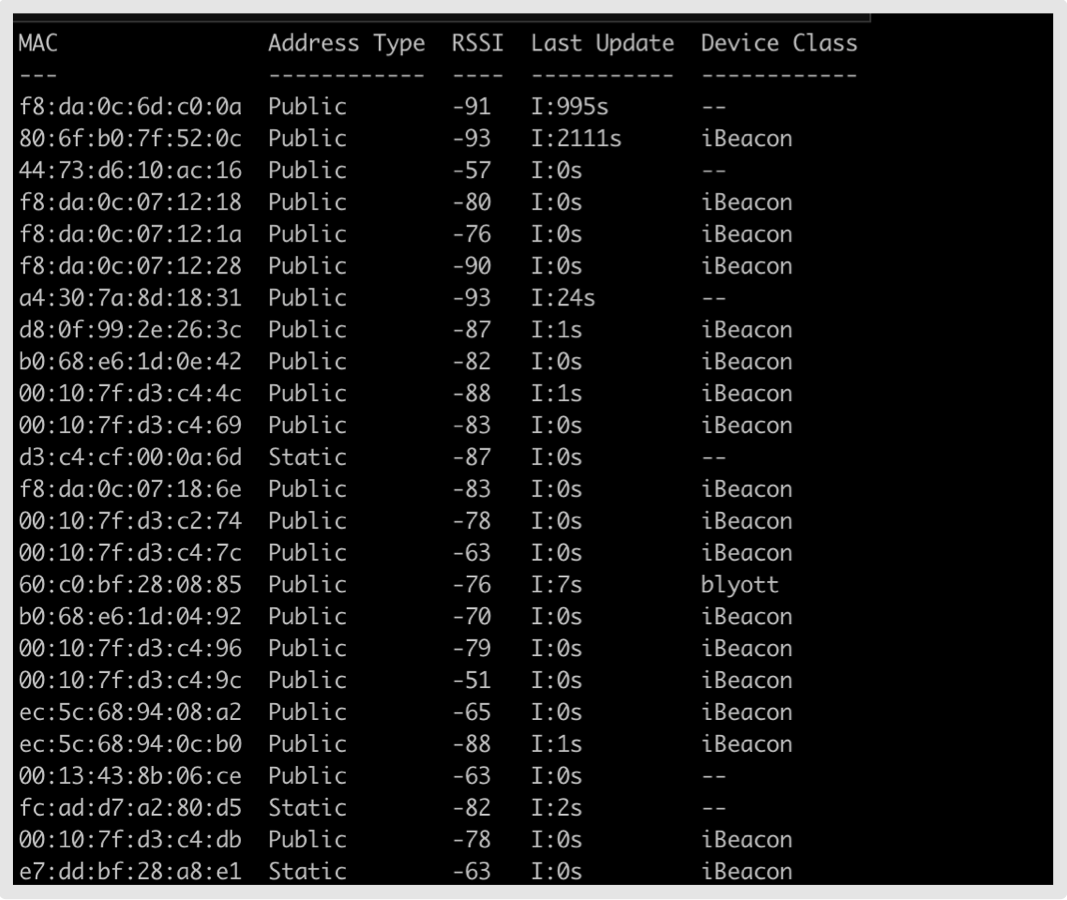
⊲ show ap debug ble-table ap-name 50816 all
⊲ You should see an output as in the following snapshot (search for the Bluetooth Mac Address of your tags). In pre AOS 8.8 release you should not see “Blyott” in the device class column.
4. ADD ARUBA AP LOCATOR ON THE BLYOTT PORTAL
Before we start, I would recommend seeing our Onboarding Handbook for more details on Blyott Portal. We have also created a support portal containing information about the Blyott platform which you can access here. The support portal contains a knowledge base where you can find all relevant information about the platform including Blyott latest API documentation.
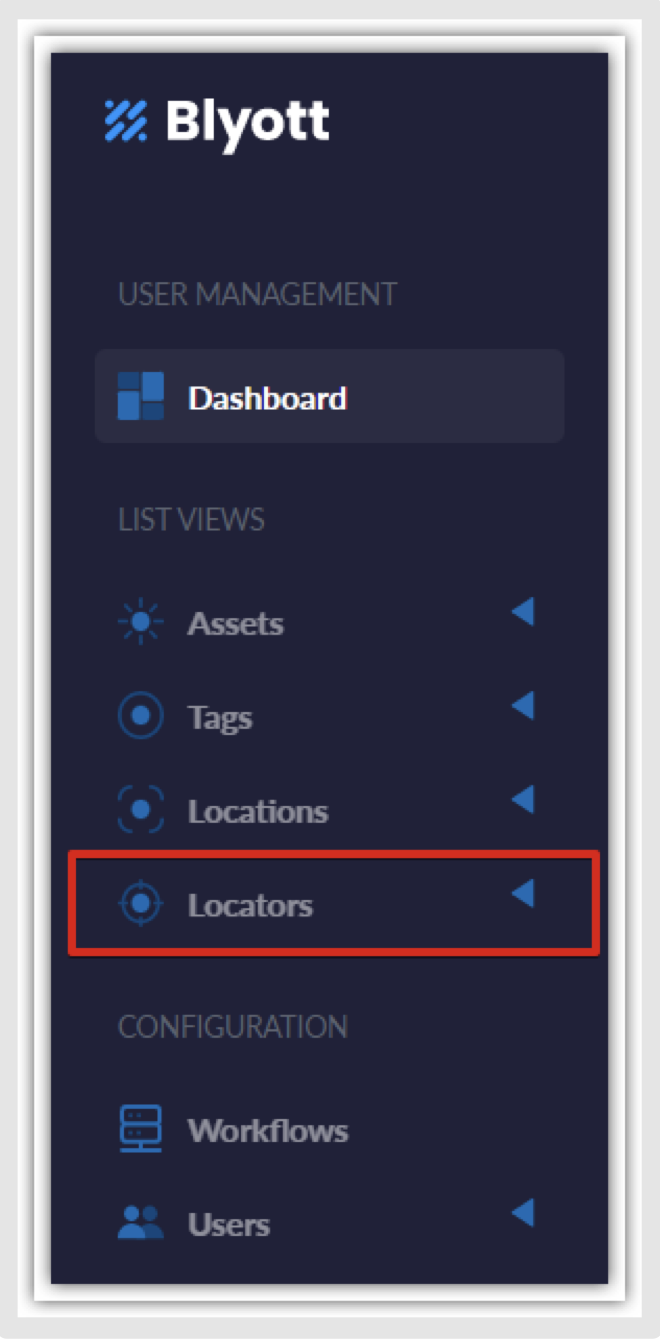
Select the “Locators” tab from the “List Views” panel (take note that different screen sizes change the panel’s layout; on smaller screens, the panel will be on the right side because of the responsiveness of the webpage - RWD).
4.1.ADD NEW LOCATOR
⊲ To add Locators, click on “+ New Locator” button from the top left corner of the screen.:

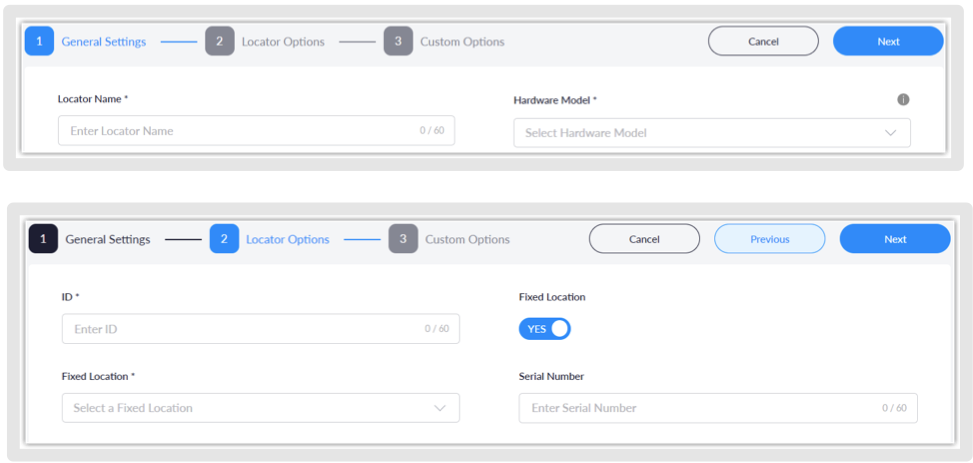
⊲ Fill in all data fields. The data fields marked with “*” are mandatory while others are optional.
-
-
“Locator Name” - Enter desired locator name.
-
“Hardware Model” - Select “Aruba | BLE-enabled”.
-
“ID” (MAC)* - Enter “Ethernet” (not BLE) MAC address of the AP.
-
“Fixed Location”
You will need to create locations in the “Location” tab before you can select the Fixed location. If you already have Locations, just select the desired Fixed Location from the dropdown list.
-
“Serial Number” - Enter serial number of the device(optional).
⊲ *Make sure to enter the correct MAC ID. This can be confirmed locally with your IT team and/or occasionally marked on the device. Enter the MAC address in capital letters and without the colon (:)
5. IMPORTANT NOTES
5.1. ETHERNET MAC ADDRESS OF ARUBA DEVICE
When working with ARUBA, the client should add per Wi-Fi AP the Ethernet MAC address (not the Bluetooth MAC address). It is the Ethernet MAC address of each AP that the Aruba WLAN controller sends to the Blyott cloud platform.
5.2. UPDATING THE ARUBAOS DISABLE BLE
Be sure to check the BLE option after you update Aruba OS, as we experienced this issue before. Updating OS change BLE to disabled as a default.
5.3. CHECK YOUR ARUBA FIRMWARE VERSION
We highly recommend updating it to the latest firmware for best performance but take in mind, depending on the firmware version you need to use different authentication methods. If your Aruba SW is v8.7 or lower, you could use “telemetry-HTTPS”. If using Aruba SW 8.8 or higher, you could use only the “telemetry-websocket” method.
5.4. FIREWALL SETTINGS
Take kindly note, the firewall can have potential blocker settings that can block the connection to our servers. Usually, we need to make sure our clients have opened ports 443(HTTPS) and 8883 on their firewall or router if they are using Blyott Locators. As per reports, the Aruba endpoint is using port 80 (443 if it uses HTTPS).
6.2. ARUBA AP SOFTWARE QUICK START GUIDE
- Official AP Software Quick Start Guide can be found in this PDF file
6.3.ARUBAOS 8.6 API DOCUMENTATION
- The full official API documentation can be found in this PDF file.
6.4.ARUBA OFFICIAL FAQ
- Official FAQ documentation can be found in here.
7. BLYOTT SUPPORT & ASSISTANCE
Within this Help Center, we aim to provide you with useful information, documentation, and guidance that will enable you to make the most out of your access to the Blyott Platform. In the Knowledgebase section you can find a video walkthrough guide for the support page, Release Notes, Documentation, Manuals, and “How to” guides.
Please be reminded that you need to register/log in to the support page to access all Blyott- related documentation.
If you have any questions or suggestions at all, please feel free to get in touch with us at helpdesk.blyott.com
Thanks and regards,
The Blyott Support Team